Dirt Cups

Baked: April 7, 2019

Recipe Sources:

Photo Credit: Daniel Beauboeuf

Happy Earth Month! While Earth Day is April 22nd, I thought I’d kick things off a little early with some earth-themed treats. I remember growing up in the midwest, every kid’s mom or dad would make a treat for their child to bring to school on his or her birthday. While most often it was cupcakes from a box (I’m not judging! Confetti cake is the best…), there was always that special moment when some parent went a step further (or perhaps took the easy route?) and made Dirt Cups. For those who have never heard of Dirt Cups, a Dirt Cup is special treat made of layers of crushed Oreo cookie and chocolate pudding, with gummy worms “crawling” out of the “dirt.” The easy way to make Dirt Cups is to buy crushed Oreos, pre-made chocolate pudding and gummy worms and then just assemble.

But of course for this challenge, I had to make everything from scratch!

My gummy worms are all natural with a base of strawberry puree and honey, I actually made “Oreo” cookies, and the chocolate pudding is the recipe from the CIA Baking and Pastry book. While it was fun to make everything from scratch, this is definitely the most time-consuming way to make a Dirt Cup. Let’s just say that if I ever have kids, I will definitely make them Dirt Cups for school on their birthday … but I assume I will be far too busy to make them from scratch!

DSC_0332.jpg

Raise your hand if you think we should make “PANGEA - cakes” for breakfast on Earth Day?! Let’s get started…

Basically every step of this bake required some chilling time. I ultimately elected to first make the “Oreo” dough which is similar in consistency to sugar cookie dough. This way, this dough could chill while I made the gummy worms and the pudding, and then be ready later for circle-cutting and baking. So overall, the steps to homemade Dirt Cups consisted of:

  1. Make “Oreo” dough, roll it out, and chill

  2. Make the gummy worm solution, pipette into molds, and chill

  3. Make chocolate pudding and chill

  4. Cut “Oreos” and bake

    // Overnight //

  5. Remove worms from molds, crush “Oreos,” and assemble Dirt Cups

Step 1: Make “Oreo” dough, roll it out, and chill

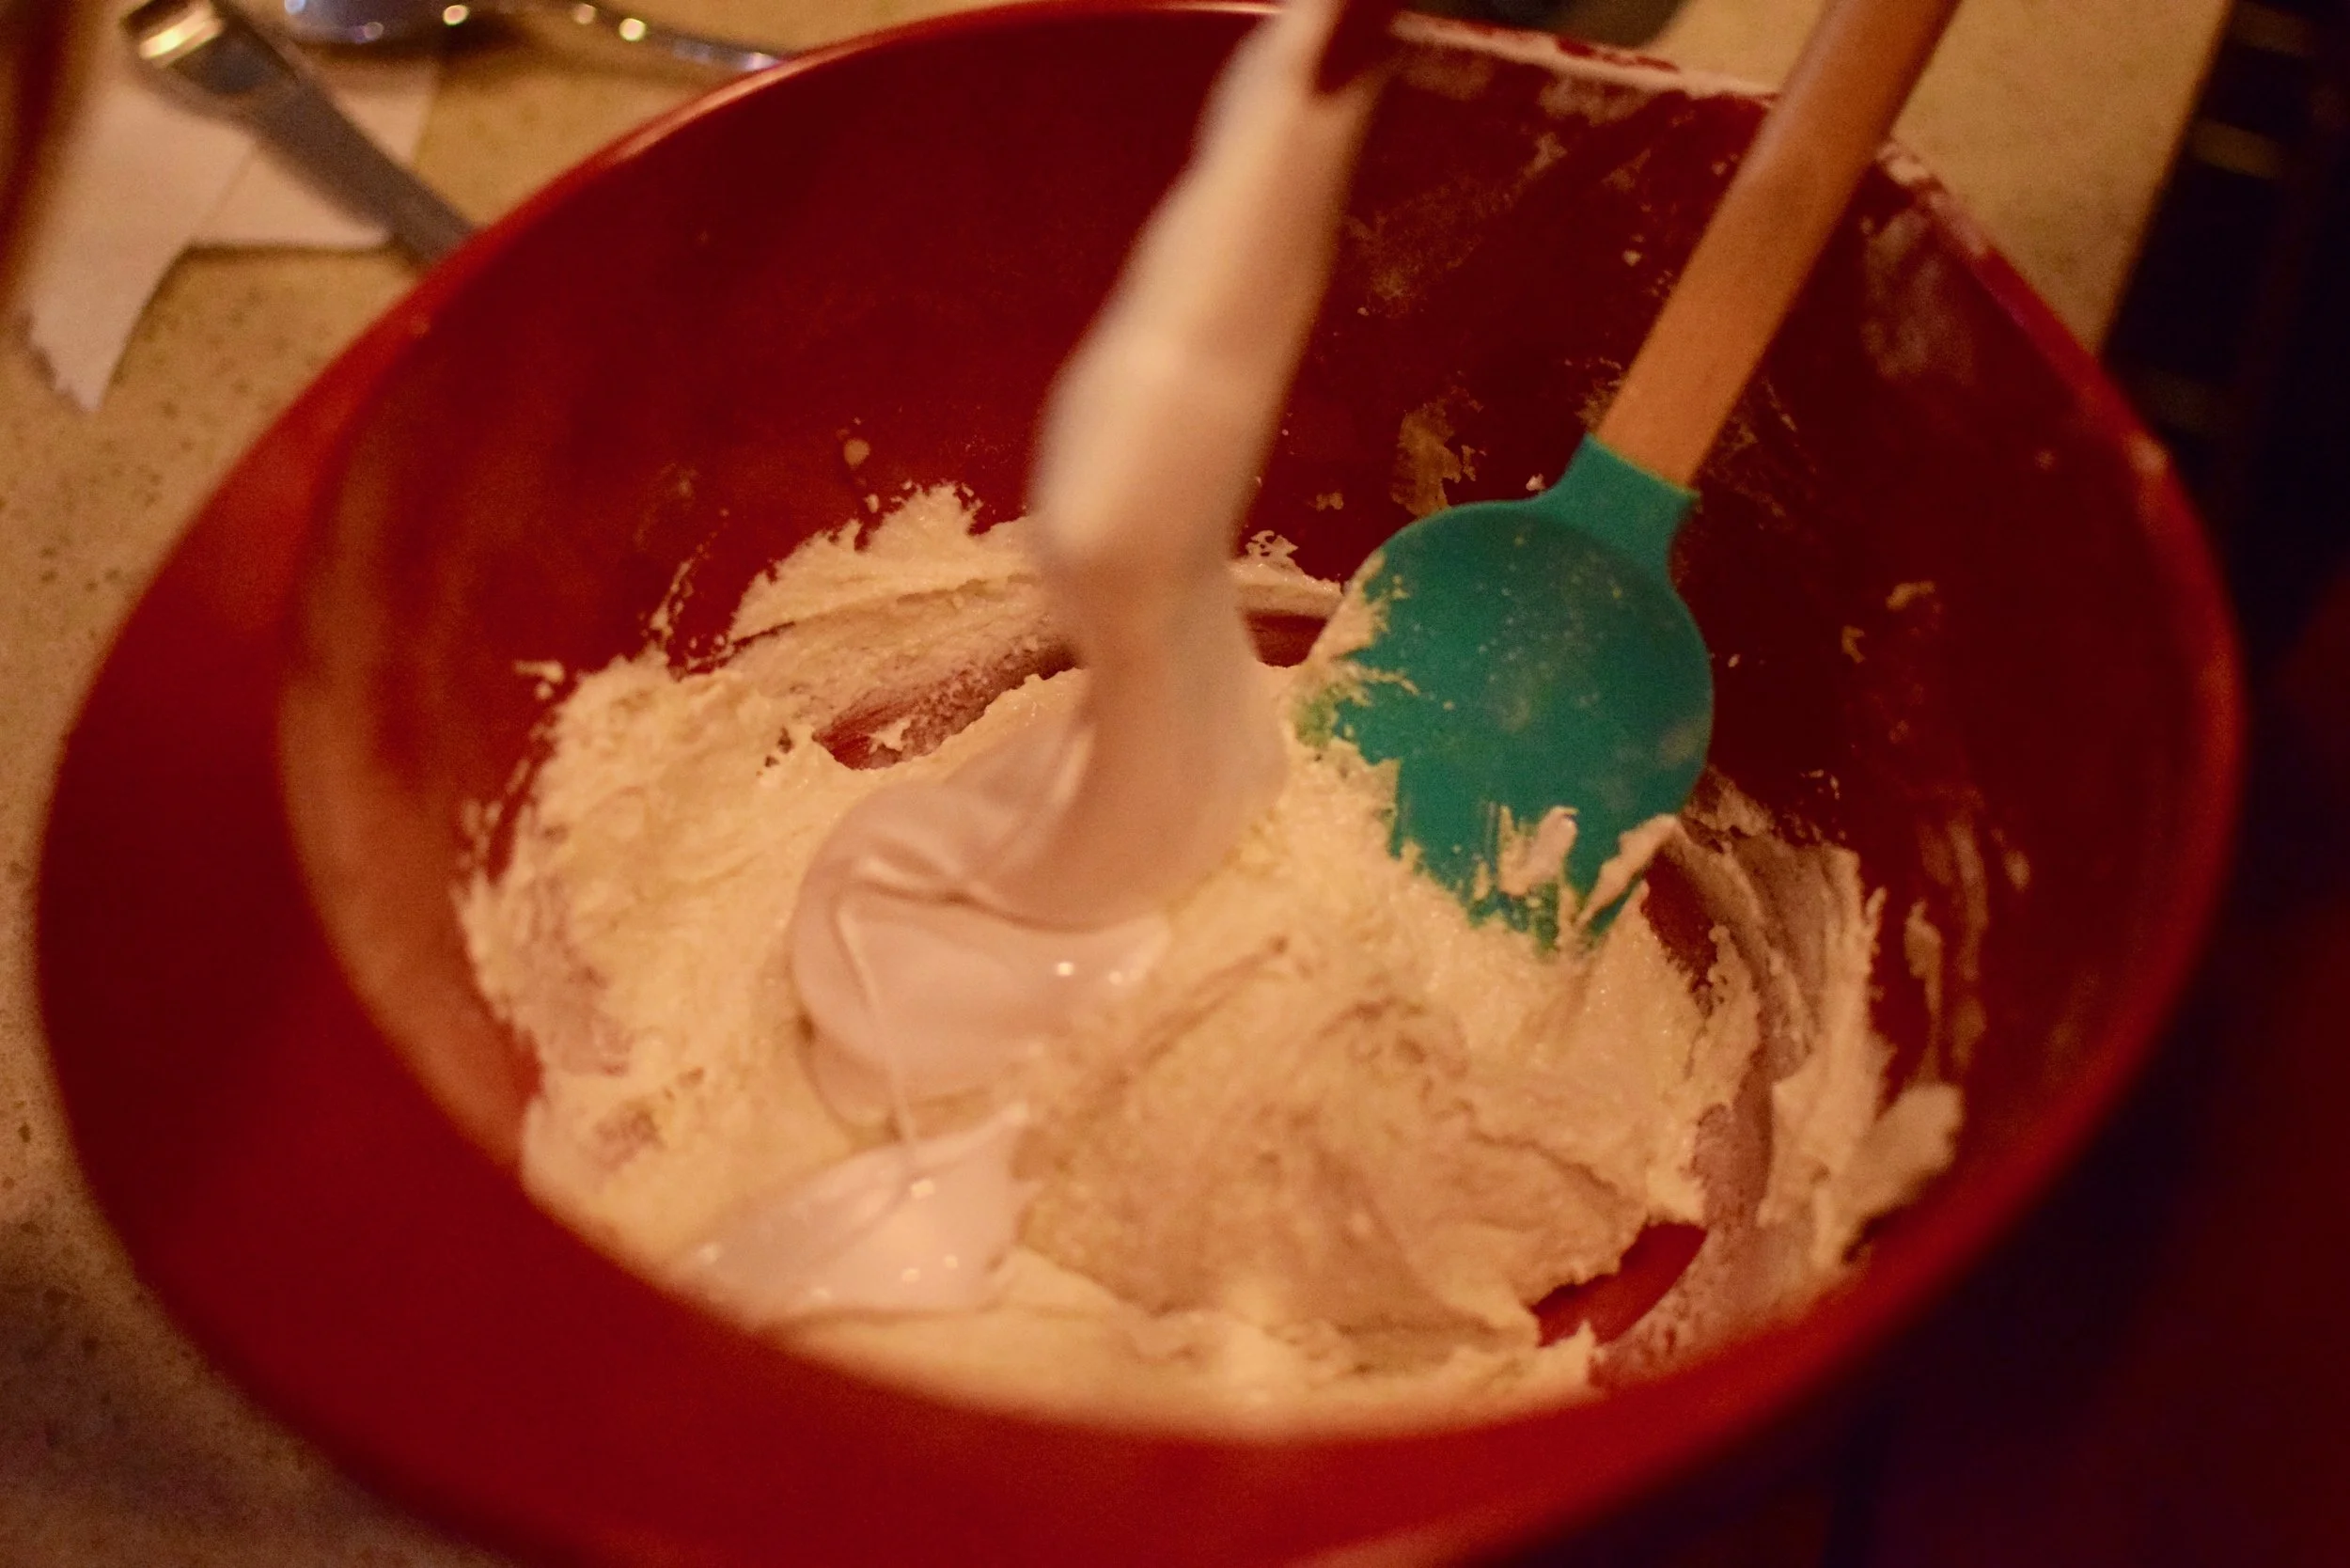
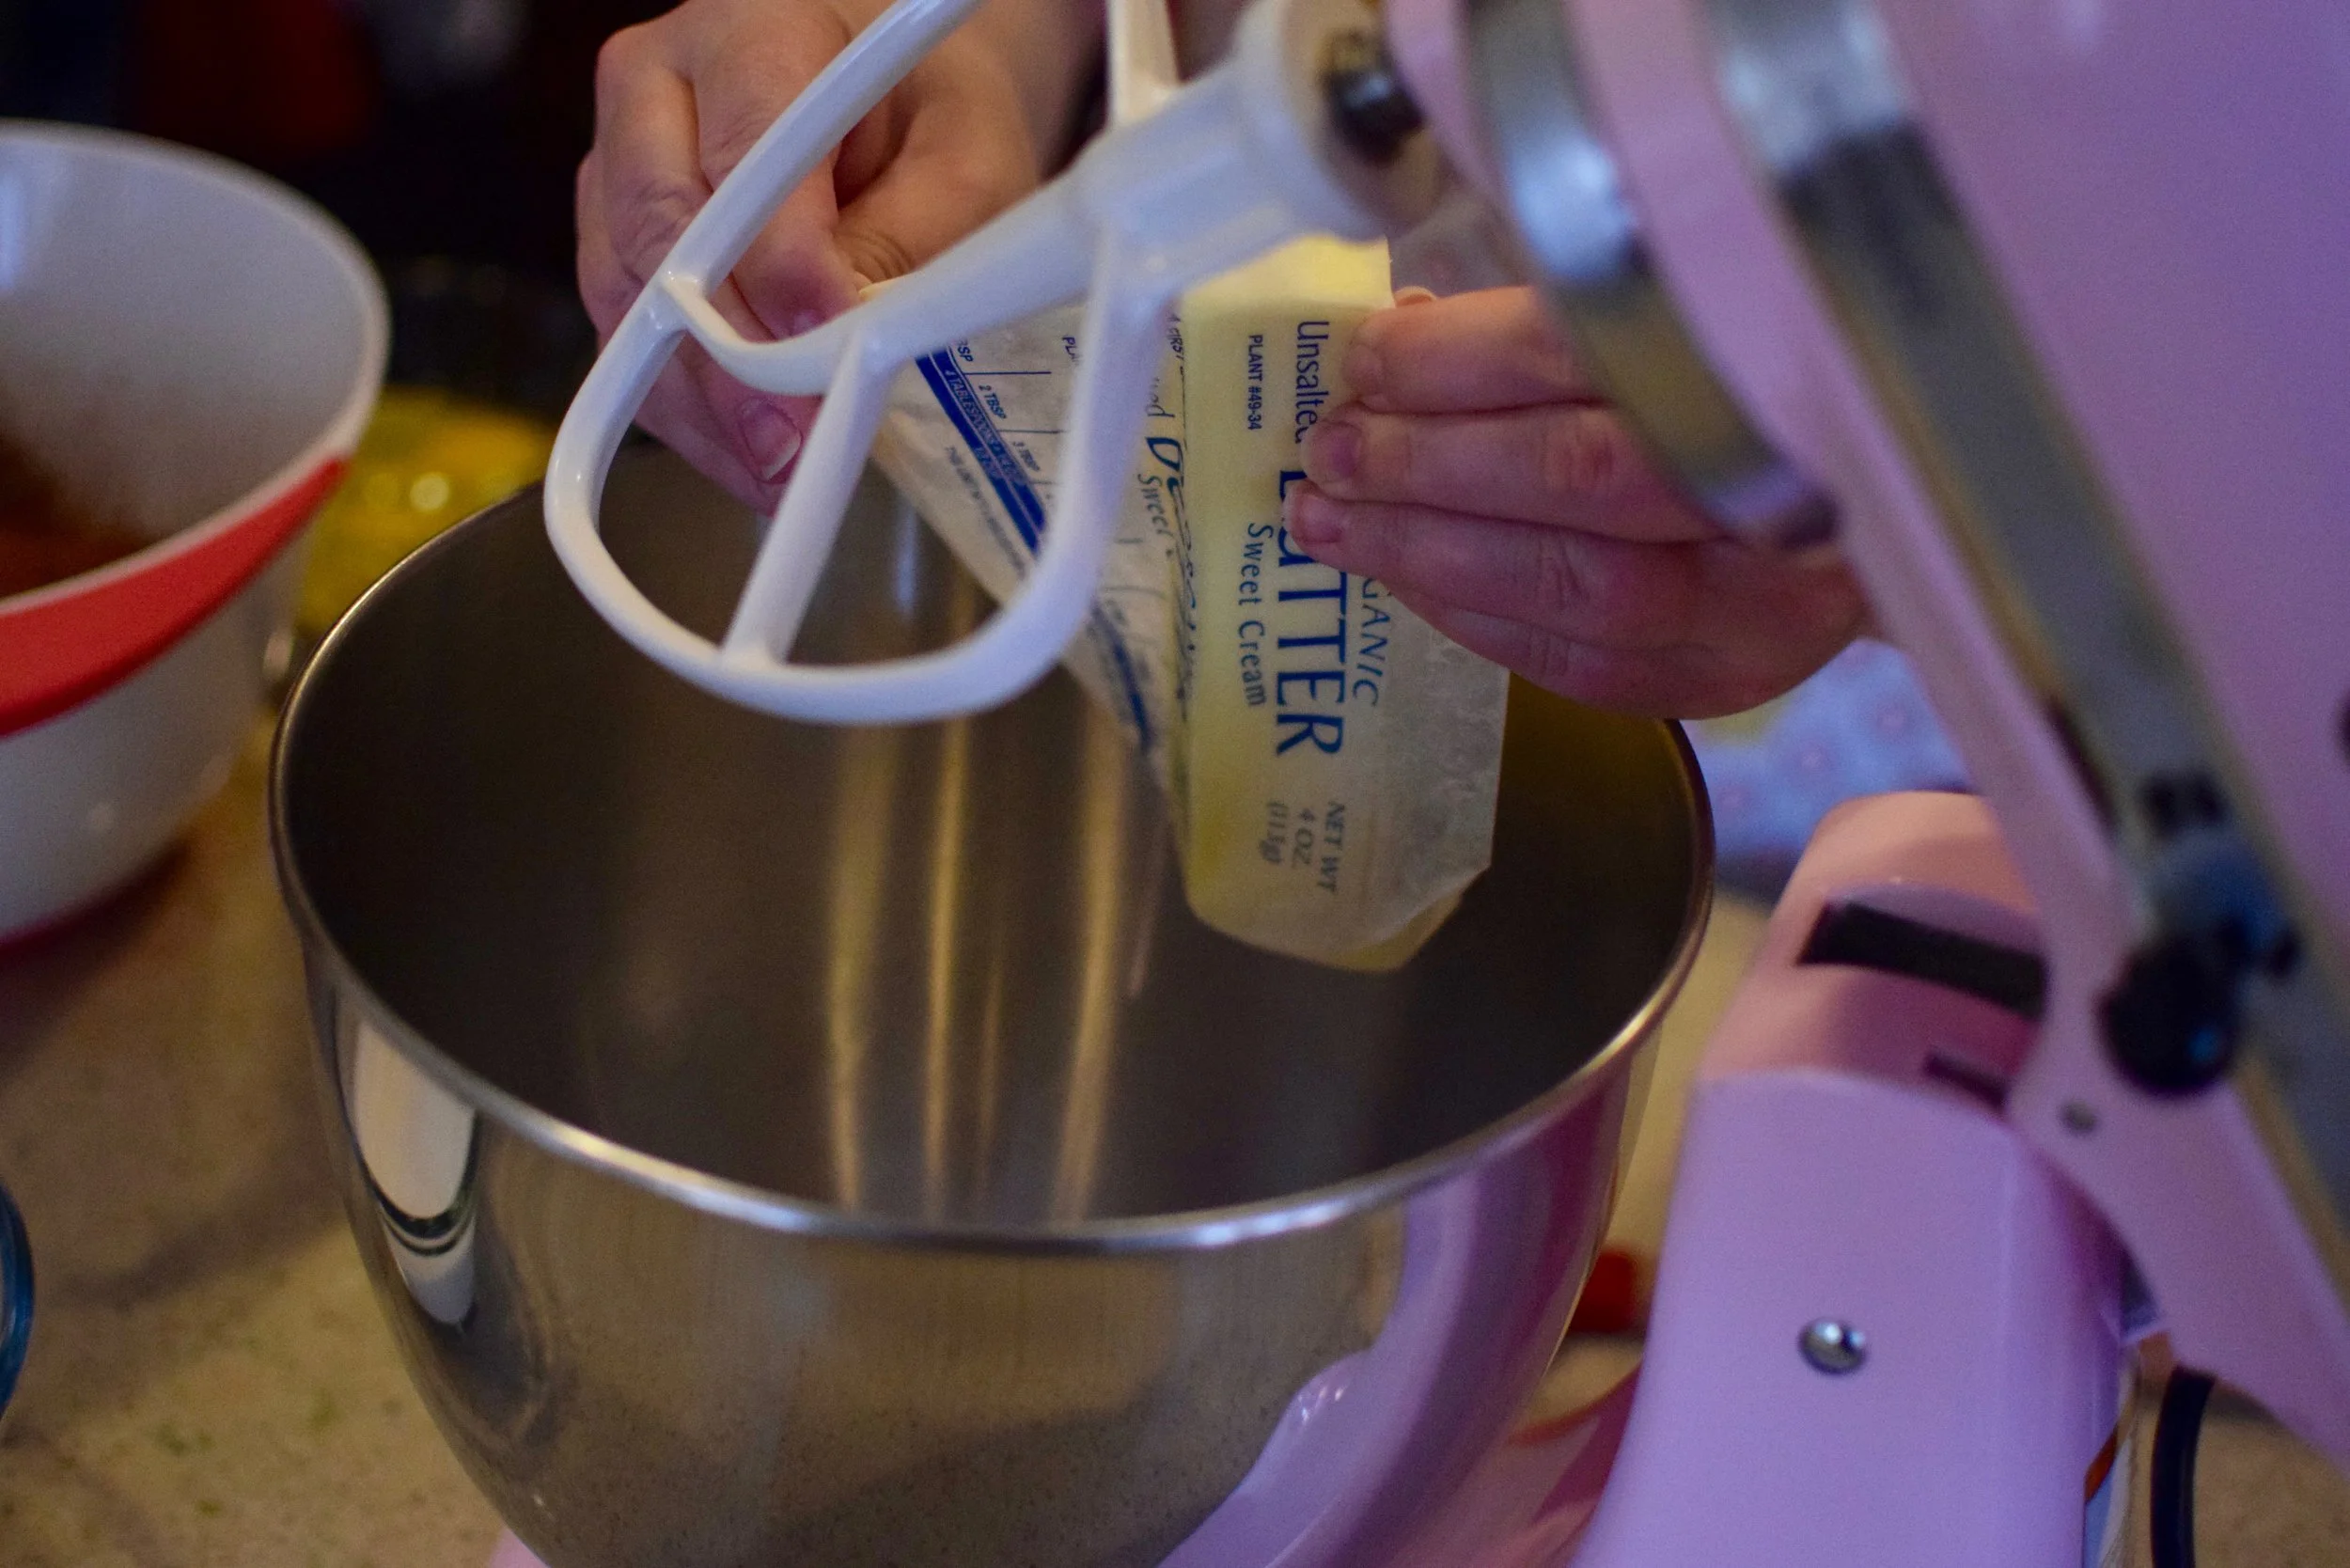
First, I creamed the butter and sugar until they just came together. I then added the eggs one at a time, incorporating fully after each addition. I then added the vanilla and continued to mix.

DSC_0347.jpg
DSC_0373.jpg
DSC_0394.jpg
DSC_0420.jpg

Prior to the above steps, I had sifted together the flour, salt and cocoa. At this step, I added this dry mixture slowly to the wet mixture. Scraping the bowl once, I continued to mix until the batter, quite dense, came together. I then separated the batter into two portions, dropping each portion onto separate pieces of parchment paper.

DSC_0439.jpg
DSC_0534.jpg
DSC_0547.jpg

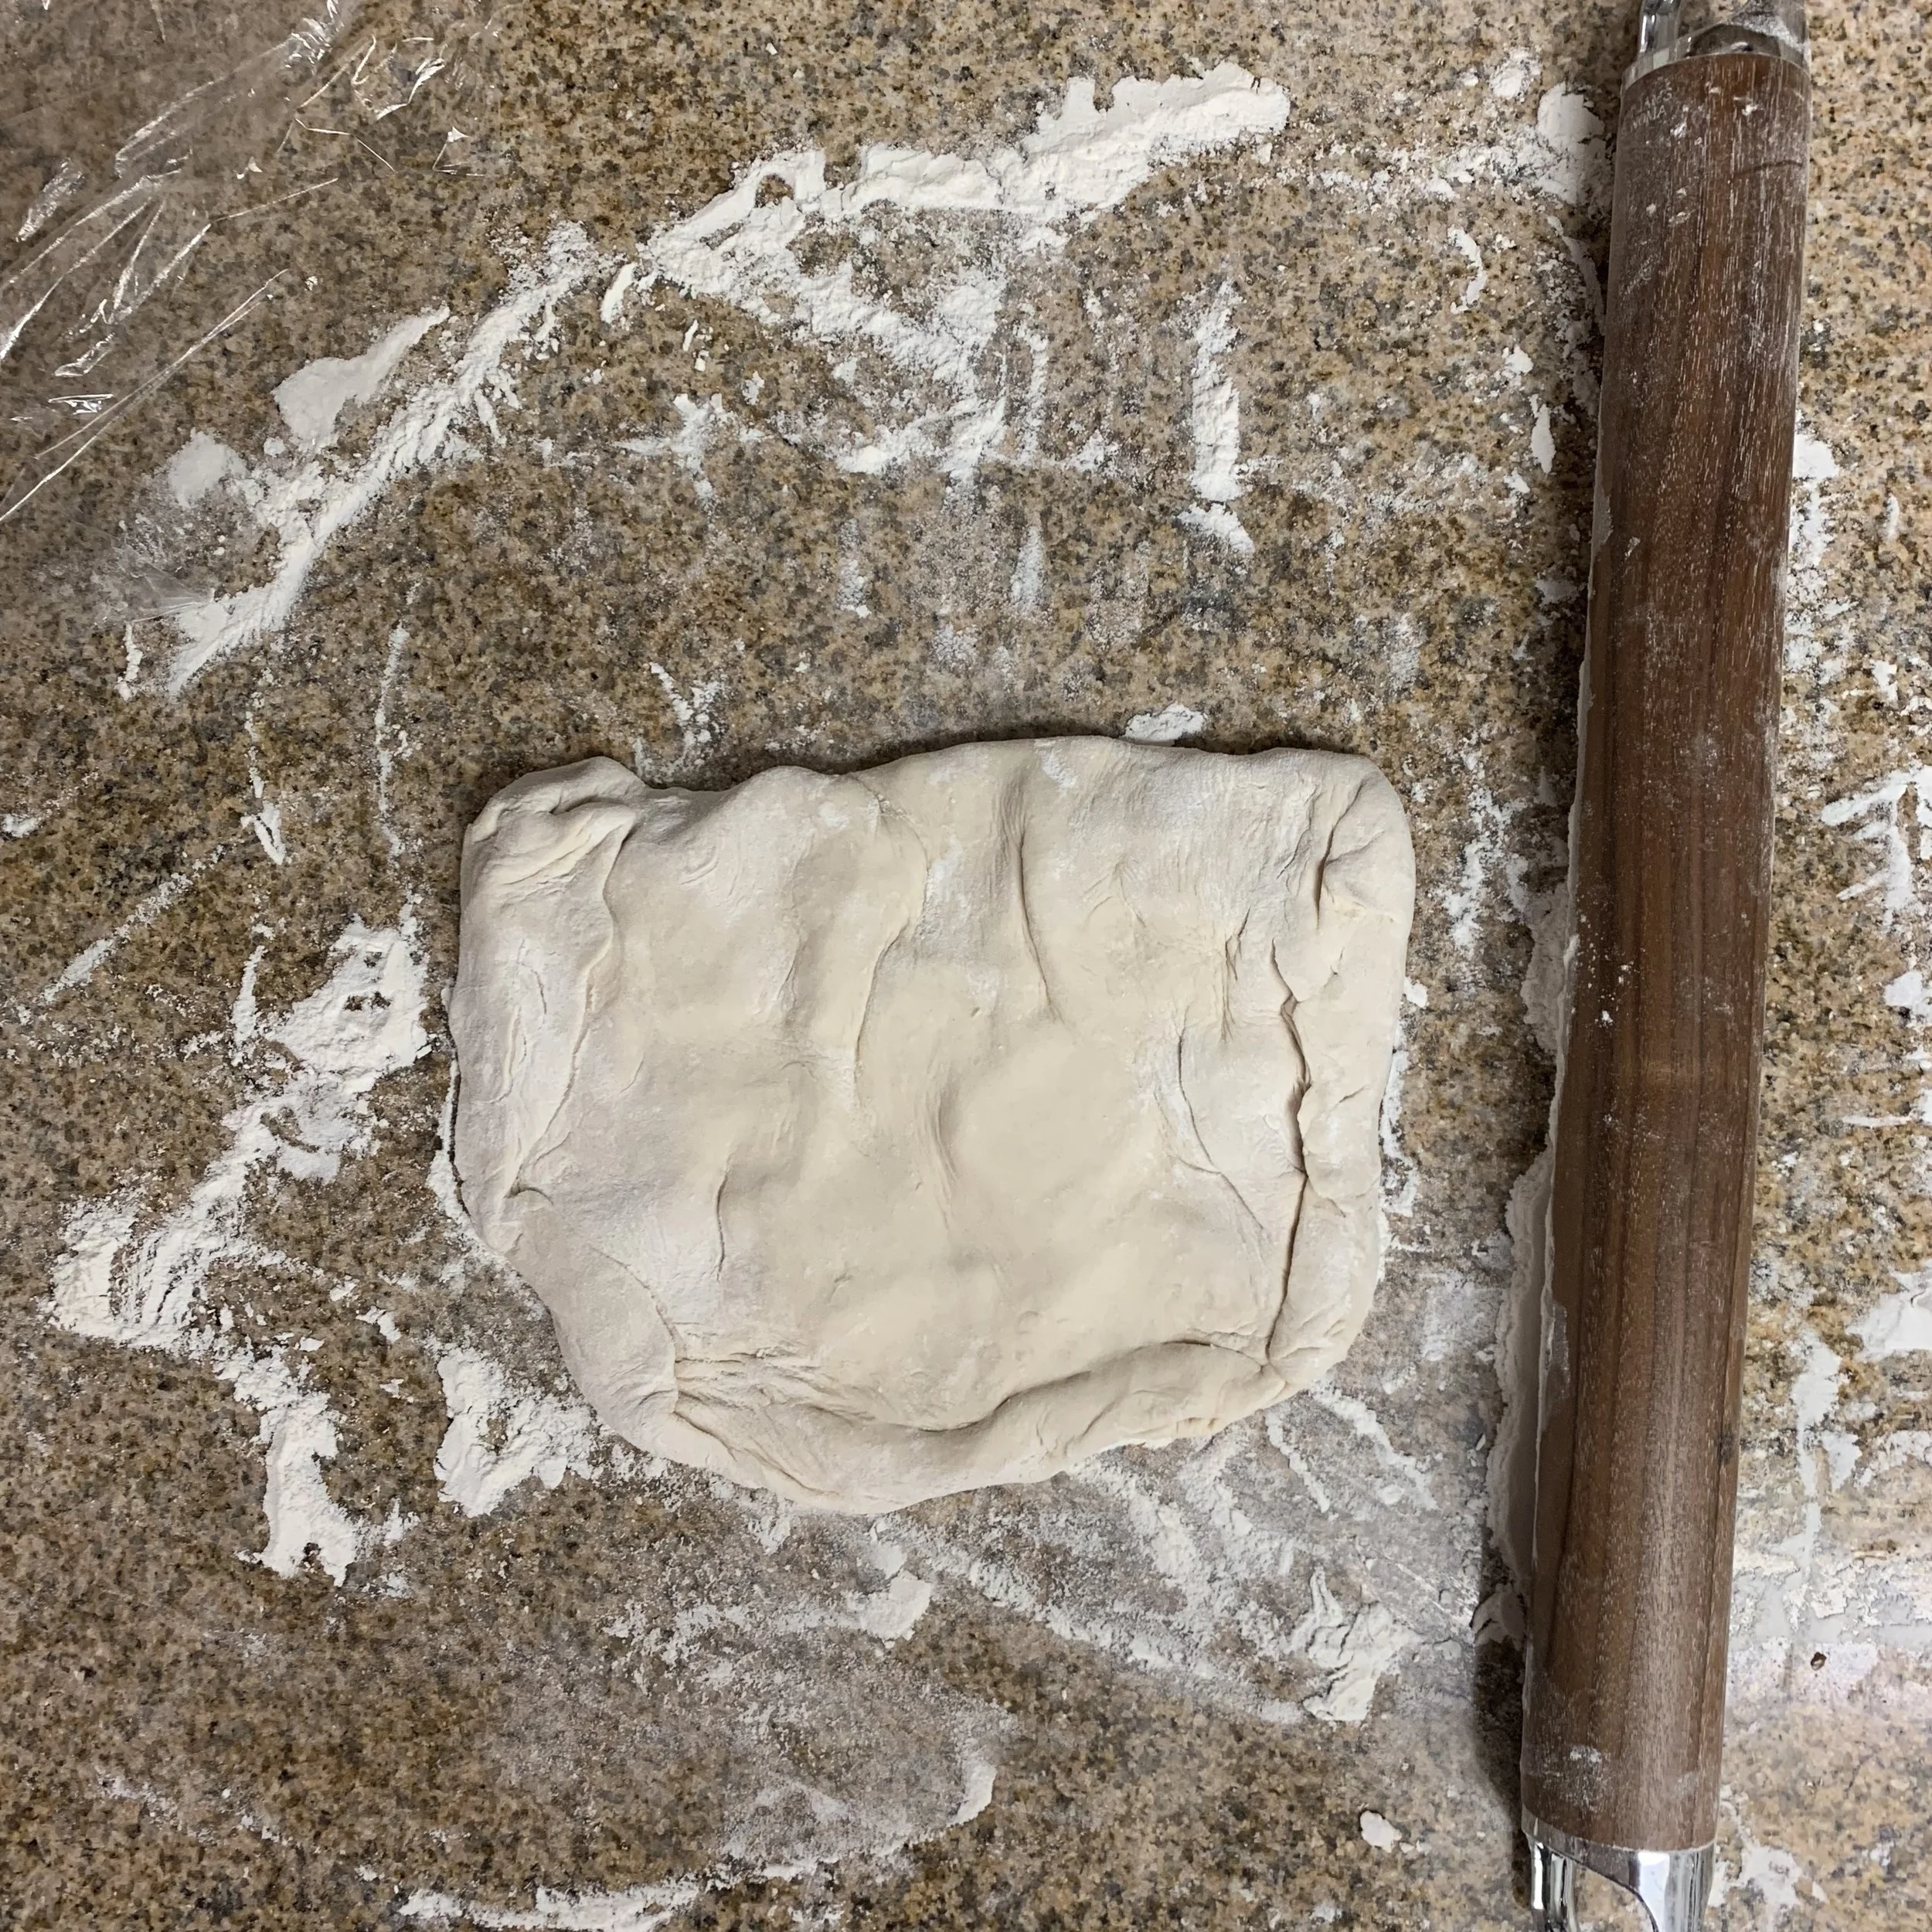
Next, I placed another piece of parchment paper on top of each portion of “oreo” dough and slightly flatten the piece of dough using my hands. Once the dough was roughly ~1 inch thick, I used a rolling pin to continue to evenly flatten the dough to about 1/4th inch thick. Since I was using a rolling pin on top of parchment paper, this often involved holding the parchment paper in place with my left hand while I pushed the rolling pin with my right hand. Once both pieces of “Oreo” dough were rolled out, I placed them in the refrigerator to chill as I made the gummy worms and pudding.

DSC_0578.jpg
DSC_0586.jpg

Step 2: Make the gummy worm solution, pipette into molds, and chill

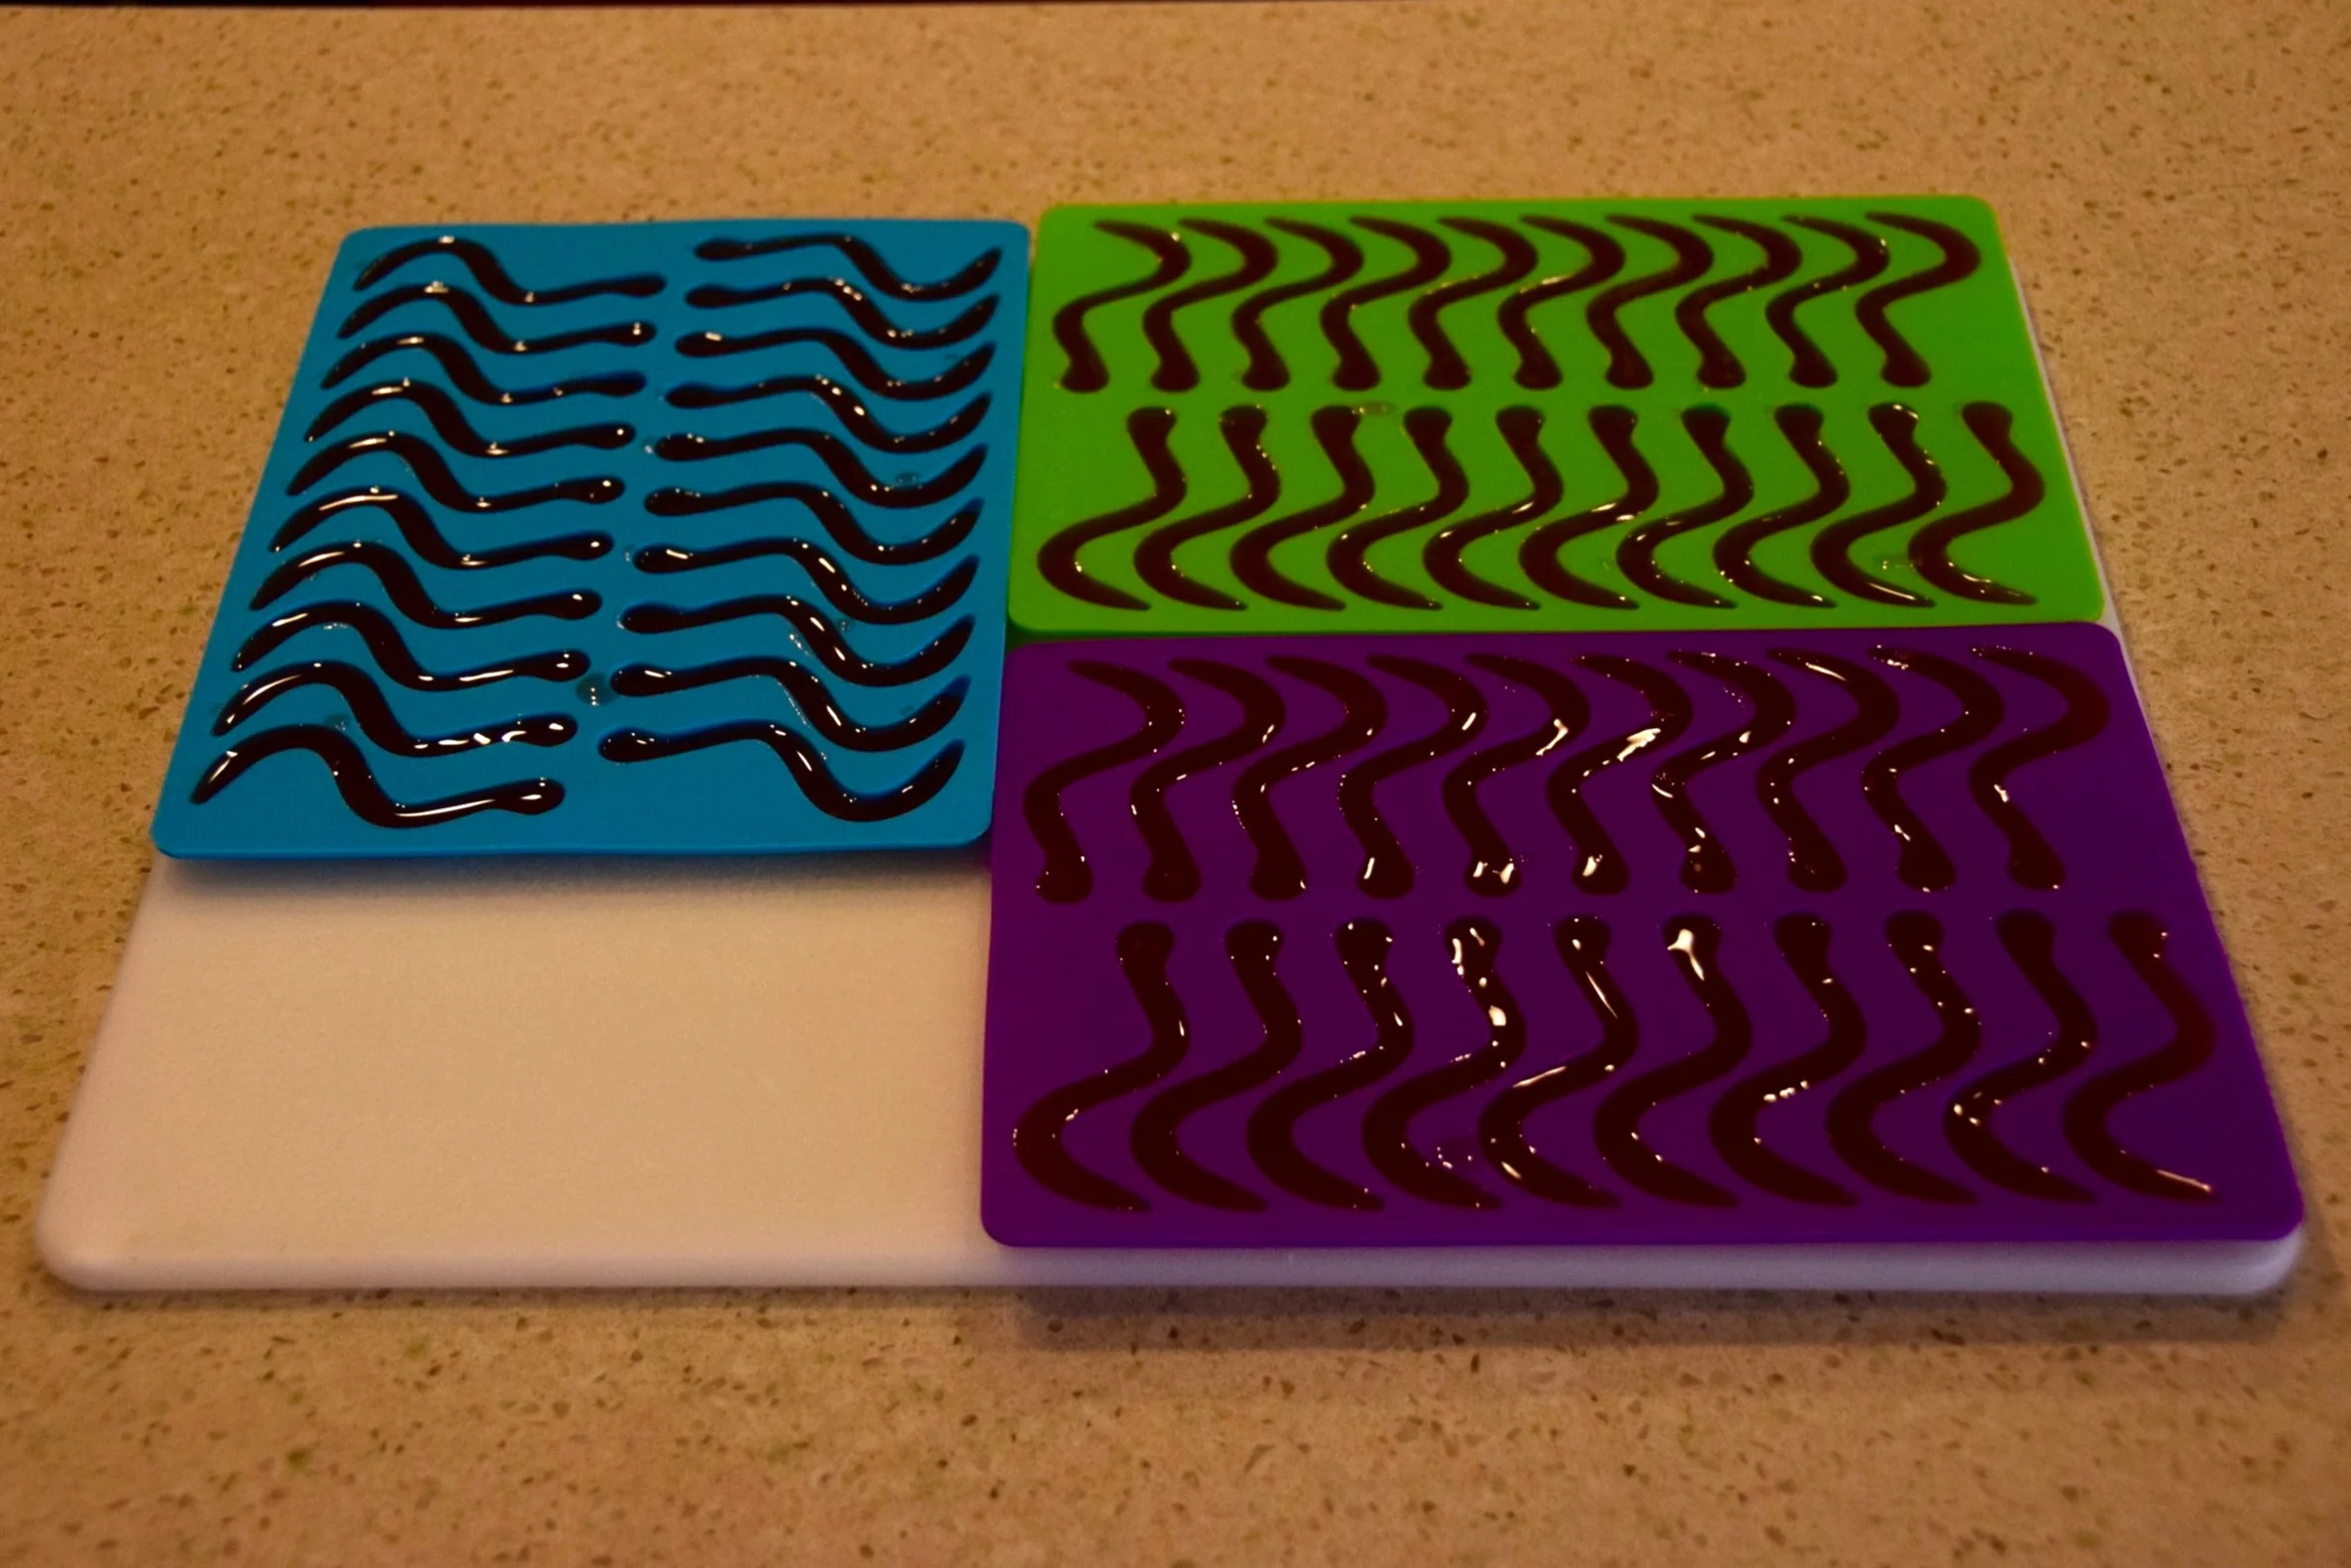
Making Gummy Worms from scratch was surprisingly easy, but it does require the right tools. Before embarking on this bake, I ordered these fun silicone molds off of Amazon, below shown filled with my gummy worm solution.

DSC_0910.jpg

I found a great recipe online that uses all natural ingredients for the Gummy Worms… so of course they are healthy… right? This simple recipe has five ingredients: strawberries, water, lemon juice, honey and gelatin.

The first step is to puree your strawberries and remove the seeds. To do this, I placed chopped strawberries in a food processor, pureed until very smooth, and then strained the puree through a sieve. The sieve will quickly get clogged with seeds and so it requires a back and forth motion with your spatula over several minutes to push seedless puree through to the collection bowl below. The result is a beautifully pink seedless solution.

DSC_0617.jpg
DSC_0630.jpg
DSC_0647.jpg
DSC_0674.jpg
DSC_0685.jpg
DSC_0683.jpg

Next I freshly squeezed some lemon juice and weighed out my gelatin.

DSC_0602.jpg
DSC_0605.jpg
DSC_0621.jpg

Combining the strawberry puree, water, honey and lemon juice in a saucepan, I slowly heated the mixture until it came to a boil. I then added the gelatin, a small portion at a time, whisking continuously. If you add the gelatin too quickly it forms clumps and is difficult to dissolve. I continued to whisk until most of the gelatin was dissolved and the mixture turned from cloudy to slight more glossy. To remove any remaining chunks of undissolved gelatin, I again strained the solution through a sieve.

DSC_0704.jpg
DSC_0777.jpg
DSC_0813.jpg
DSC_0838.jpg

Of course the last step is to pipette the strawberry gelatin mixture into the molds to set. This reminded me of being in a research lab again, albeit with much less sophisticated tools! I had forgotten how almost meditative I always found it to pipette over and over again into wells of a plate. It’s a simple non-stressful task, yet requires attention to detail so your mind cannot wander.

DSC_0907.jpg

Step 3: Make chocolate pudding and chill

I wondered if I should categorize this bake as a “Challenge” Bake or a “Just for Fun” bake. While I have no doubt CIA would never stoop as low as to include a recipe for Dirt Cups in their book, a critical component of dirt cups is chocolate pudding. If you’re going to do chocolate pudding, why not do it right? So I of course used the chocolate pudding recipe from the CIA book.

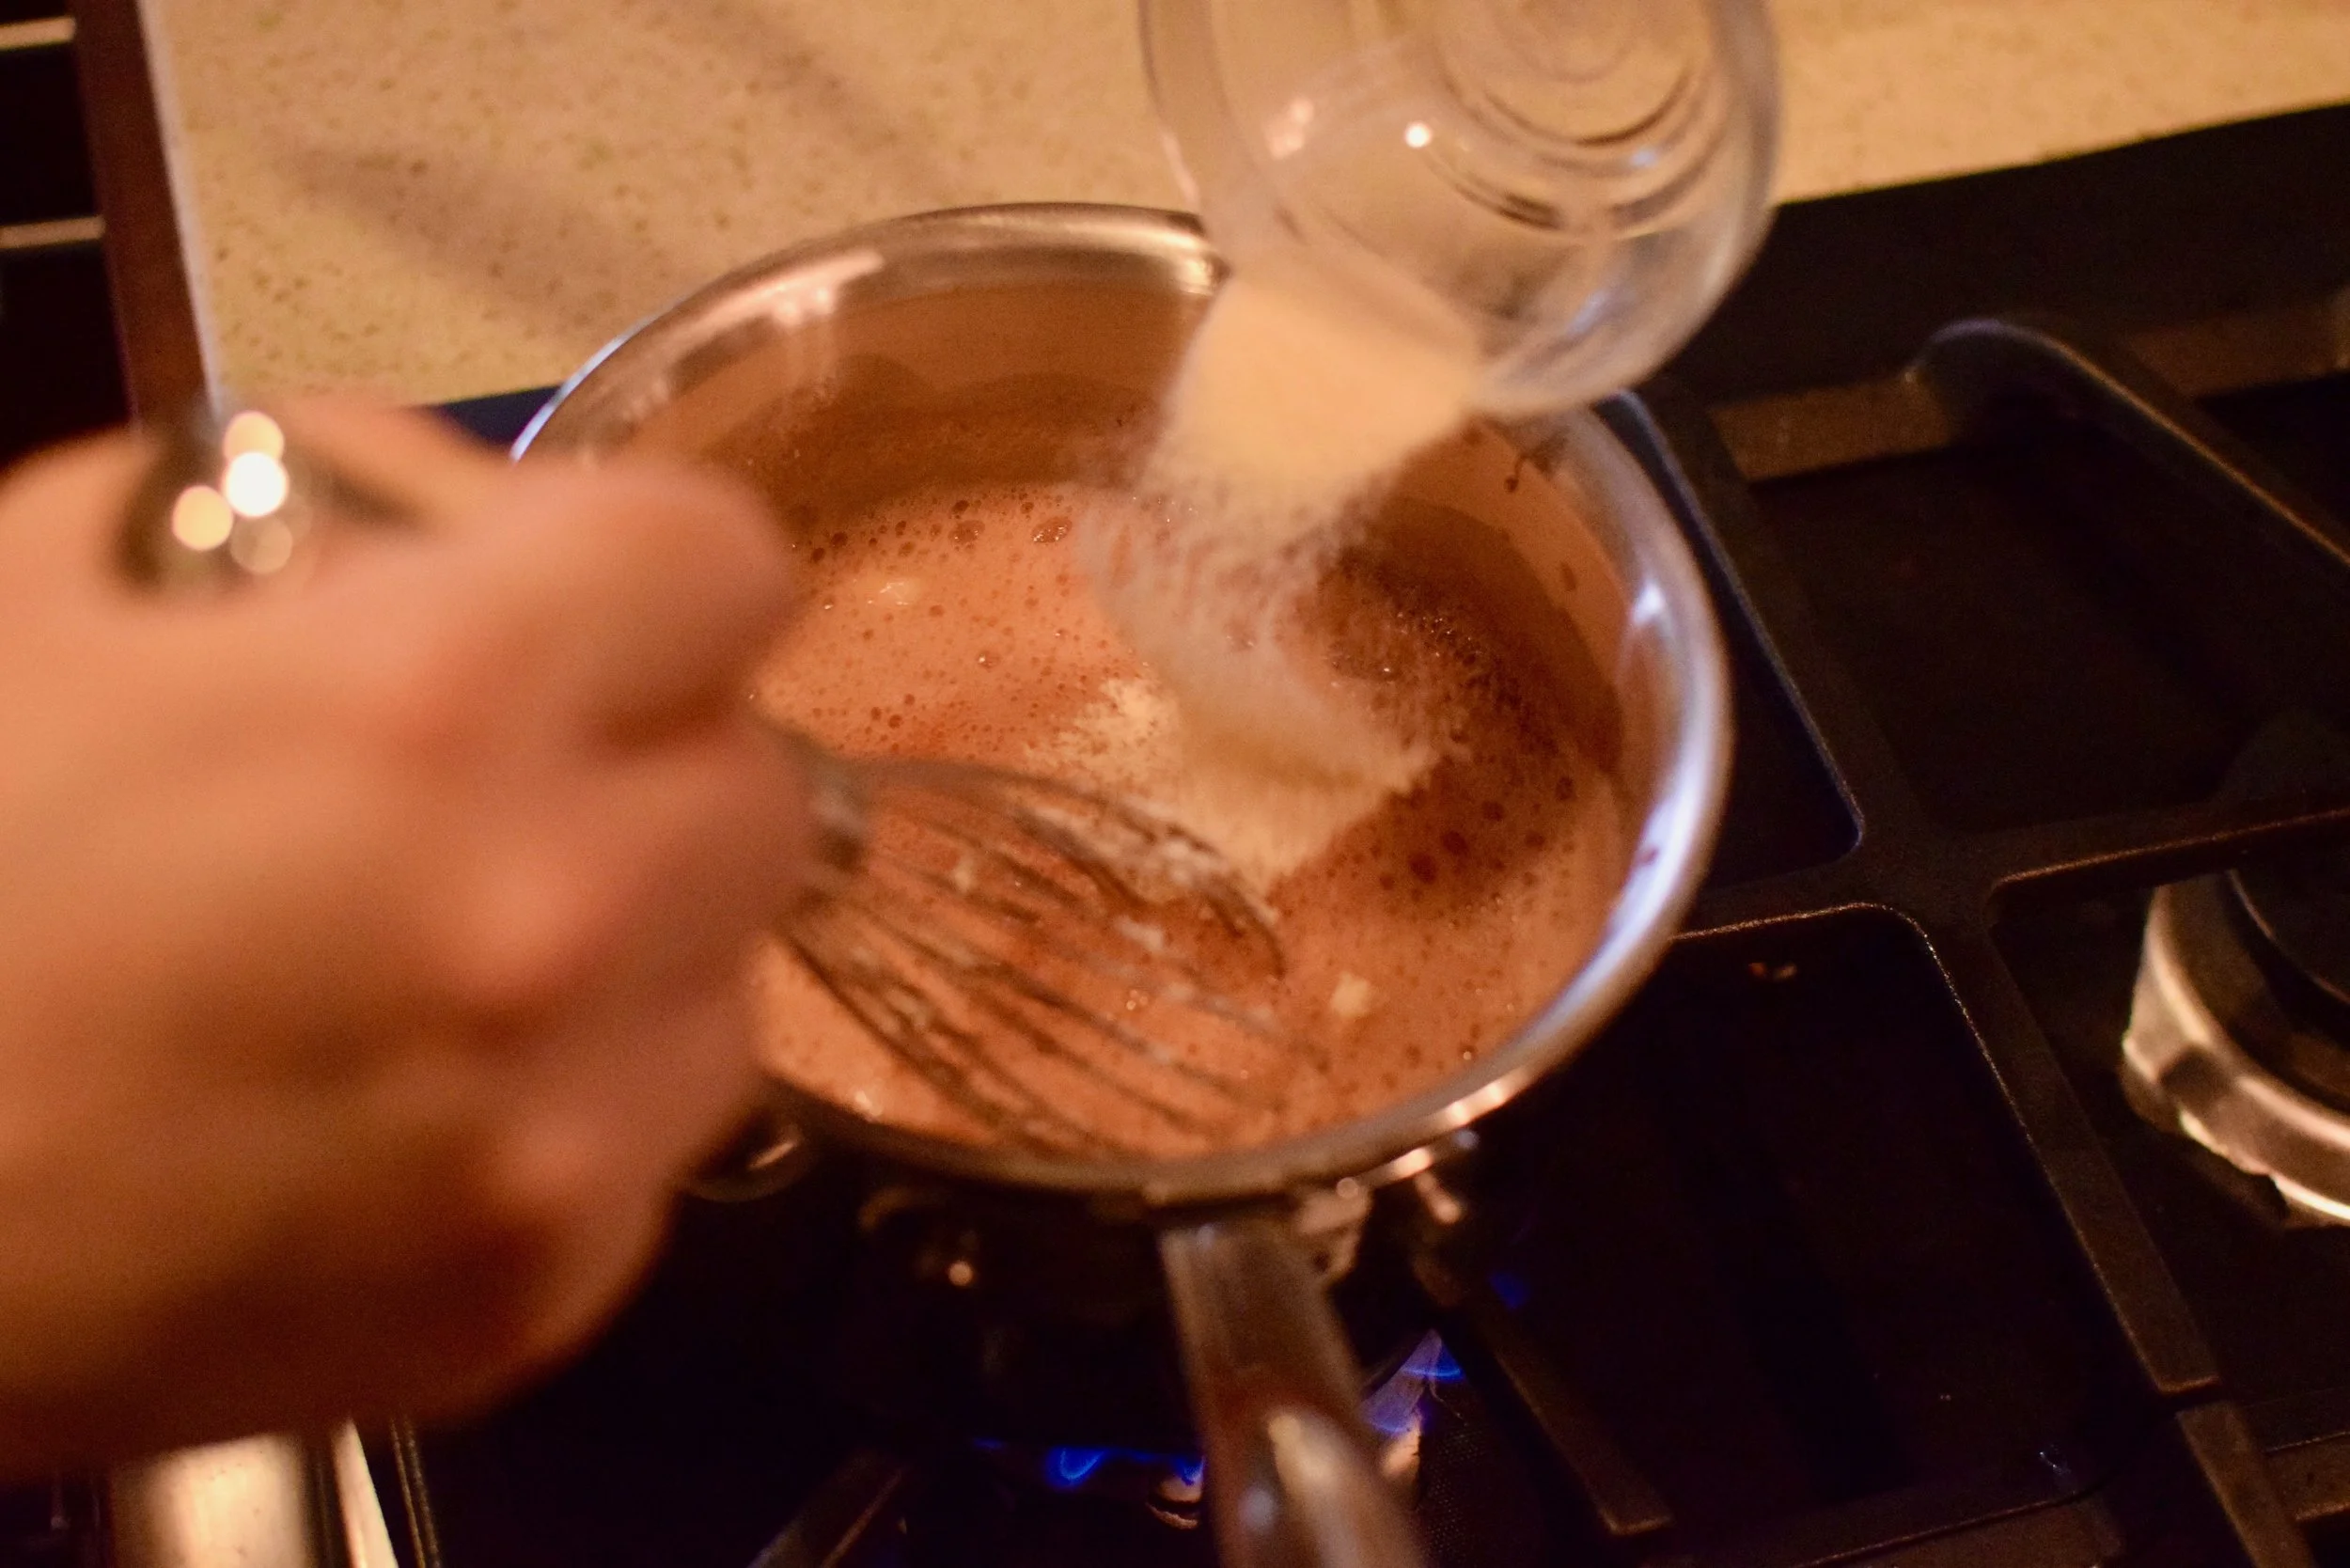
Pudding is essentially milk, sugar, egg yolks and flavoring that have been heated with cornstarch in order to gel into the pudding-like structure. The first step is to combine cornstarch and sugar, and then slowly add whole milk to this mixture while whisking continuously. Next, I added egg yolks one at a time, whisking until completely incorporated after each addition. I whisked the full mixture until it was smooth and set aside.

DSC_0963.jpg
DSC_0965.jpg

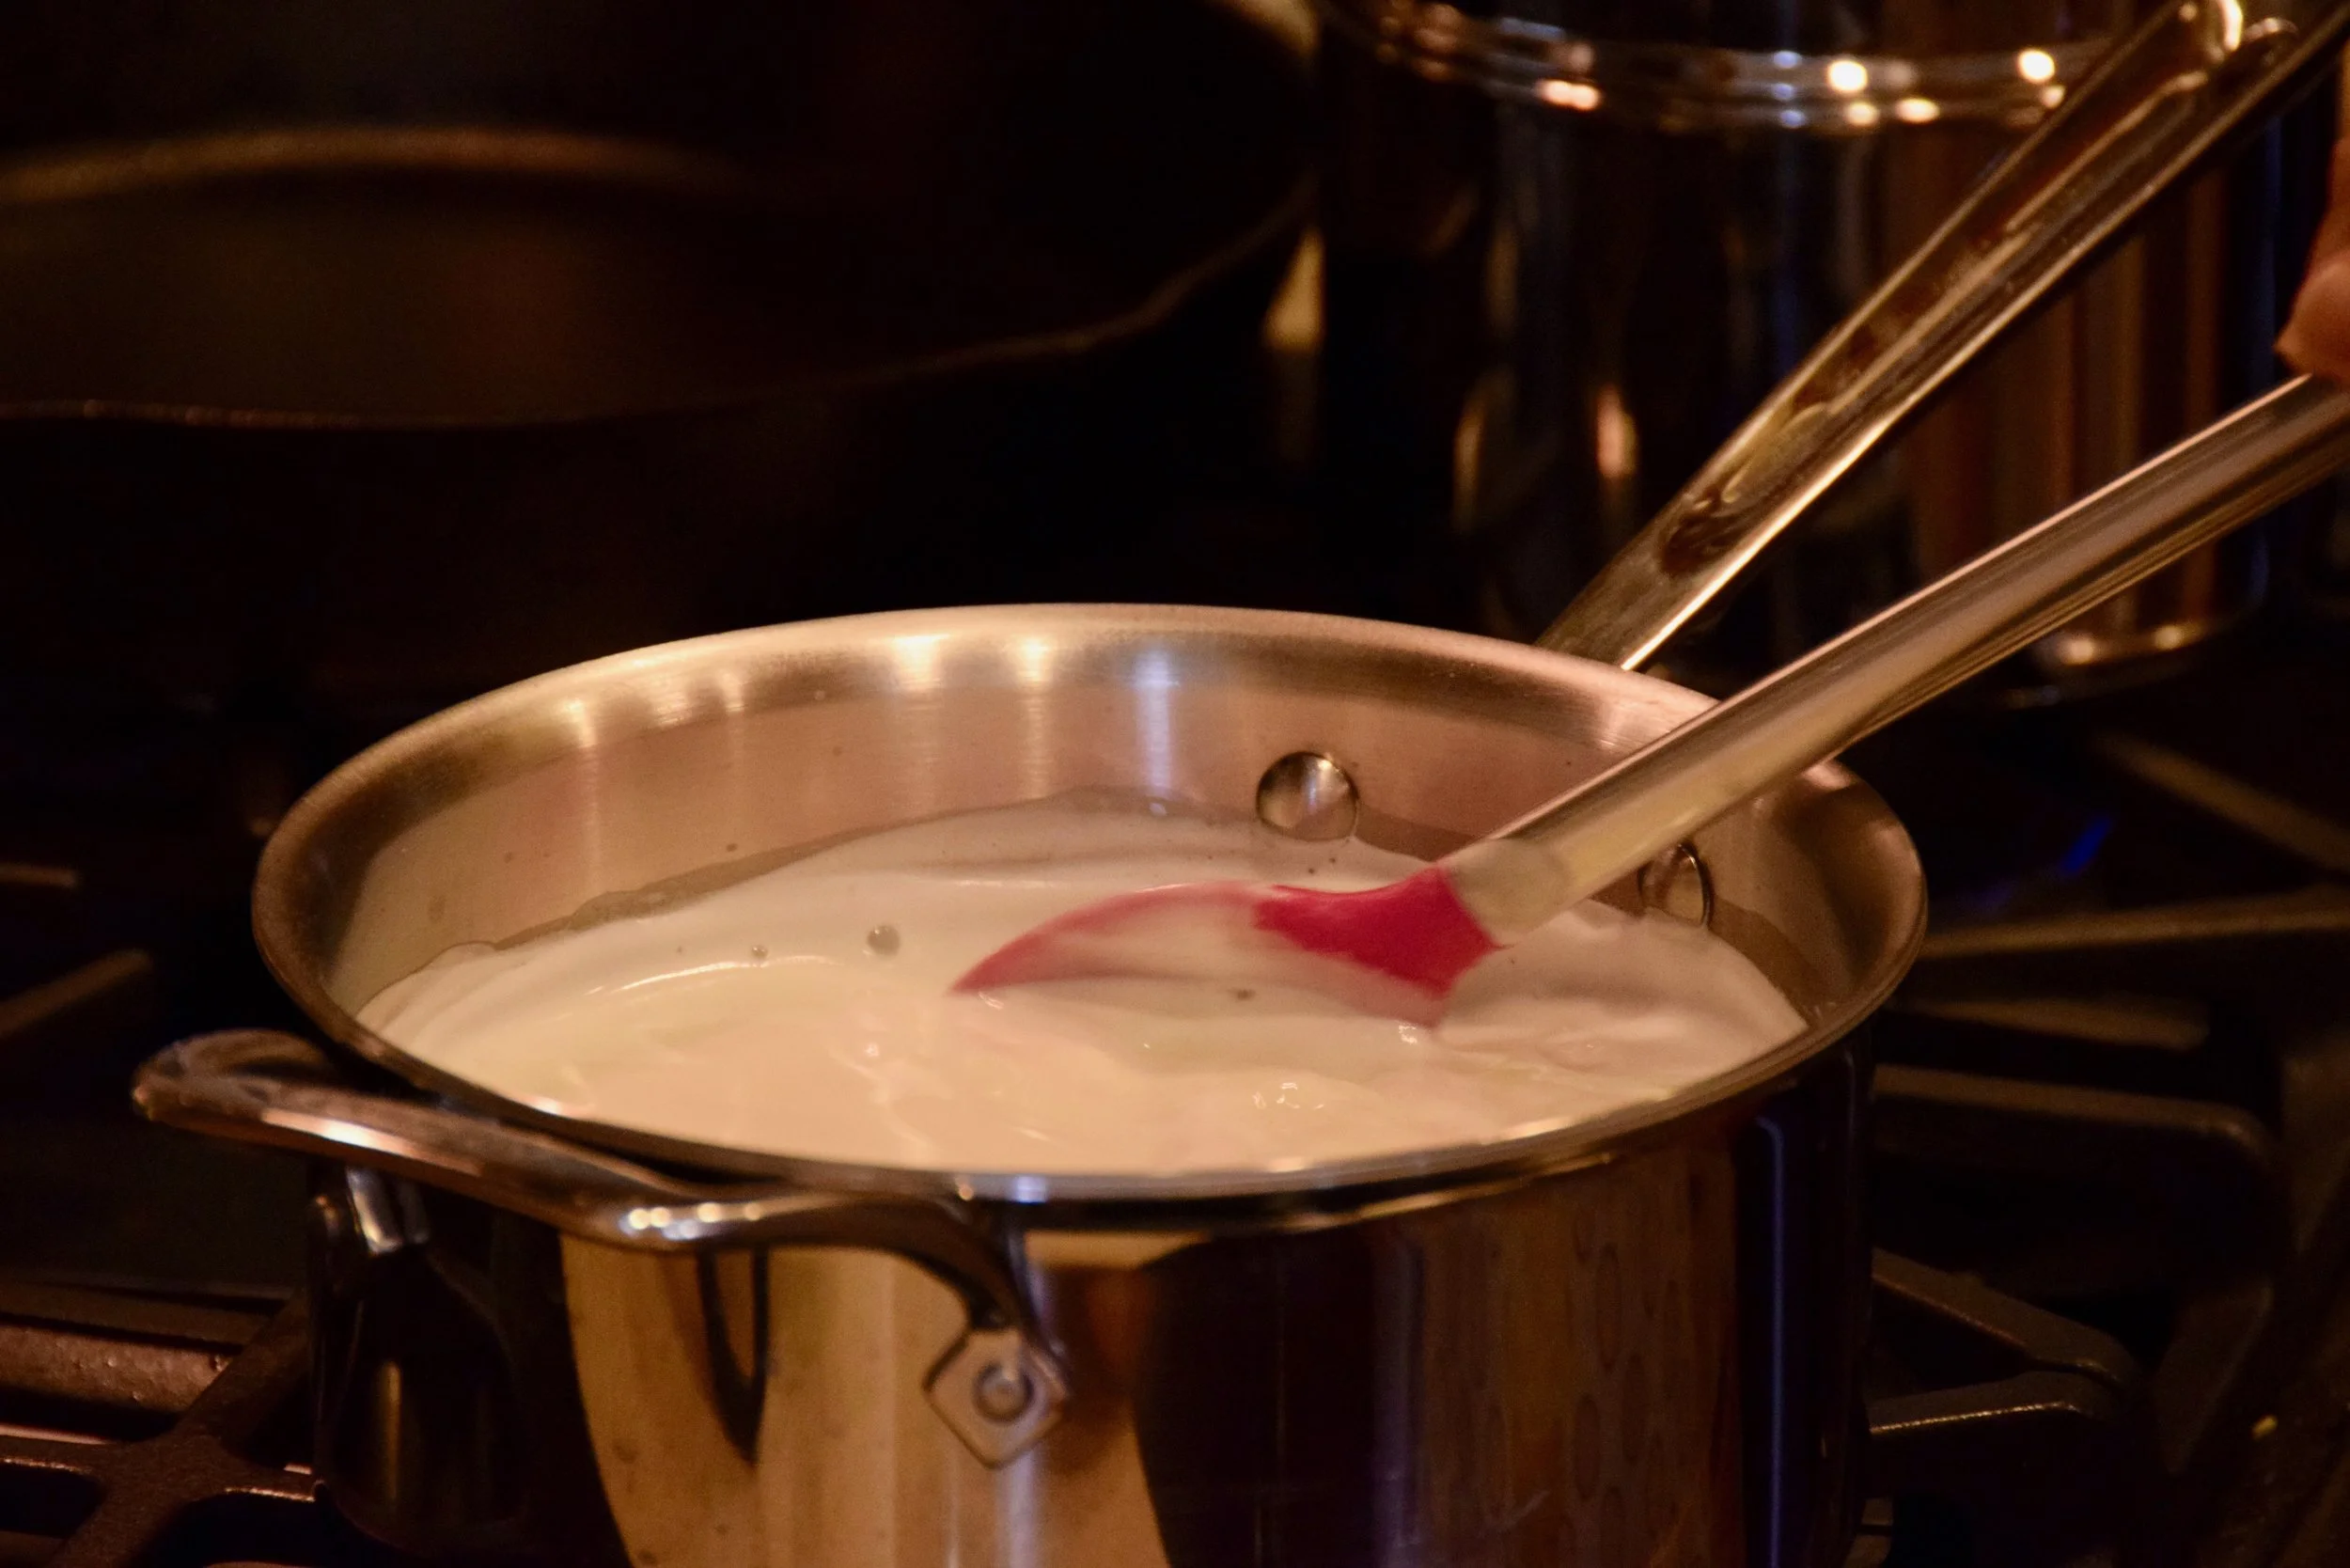
Separately, I heated whole milk and sugar until brought to a boil. I tempered the original cornstarch, milk and egg mixture by adding some of the hot milk slowly while mixing (not shown) and then slowly added this tempered mixture back to the hot milk mixture, whisking continuously. I continued to heat and whisk this mixture until it thickened to a pudding-like consistency. Turning off the heat, I then added butter and vanilla extract and continued to stir with a whisk.

DSC_1004.jpg
DSC_1013.jpg
DSC_0016.jpg
DSC_0029.jpg

During this whole process I had been multi-tasking a little bit…

DSC_0994.jpg

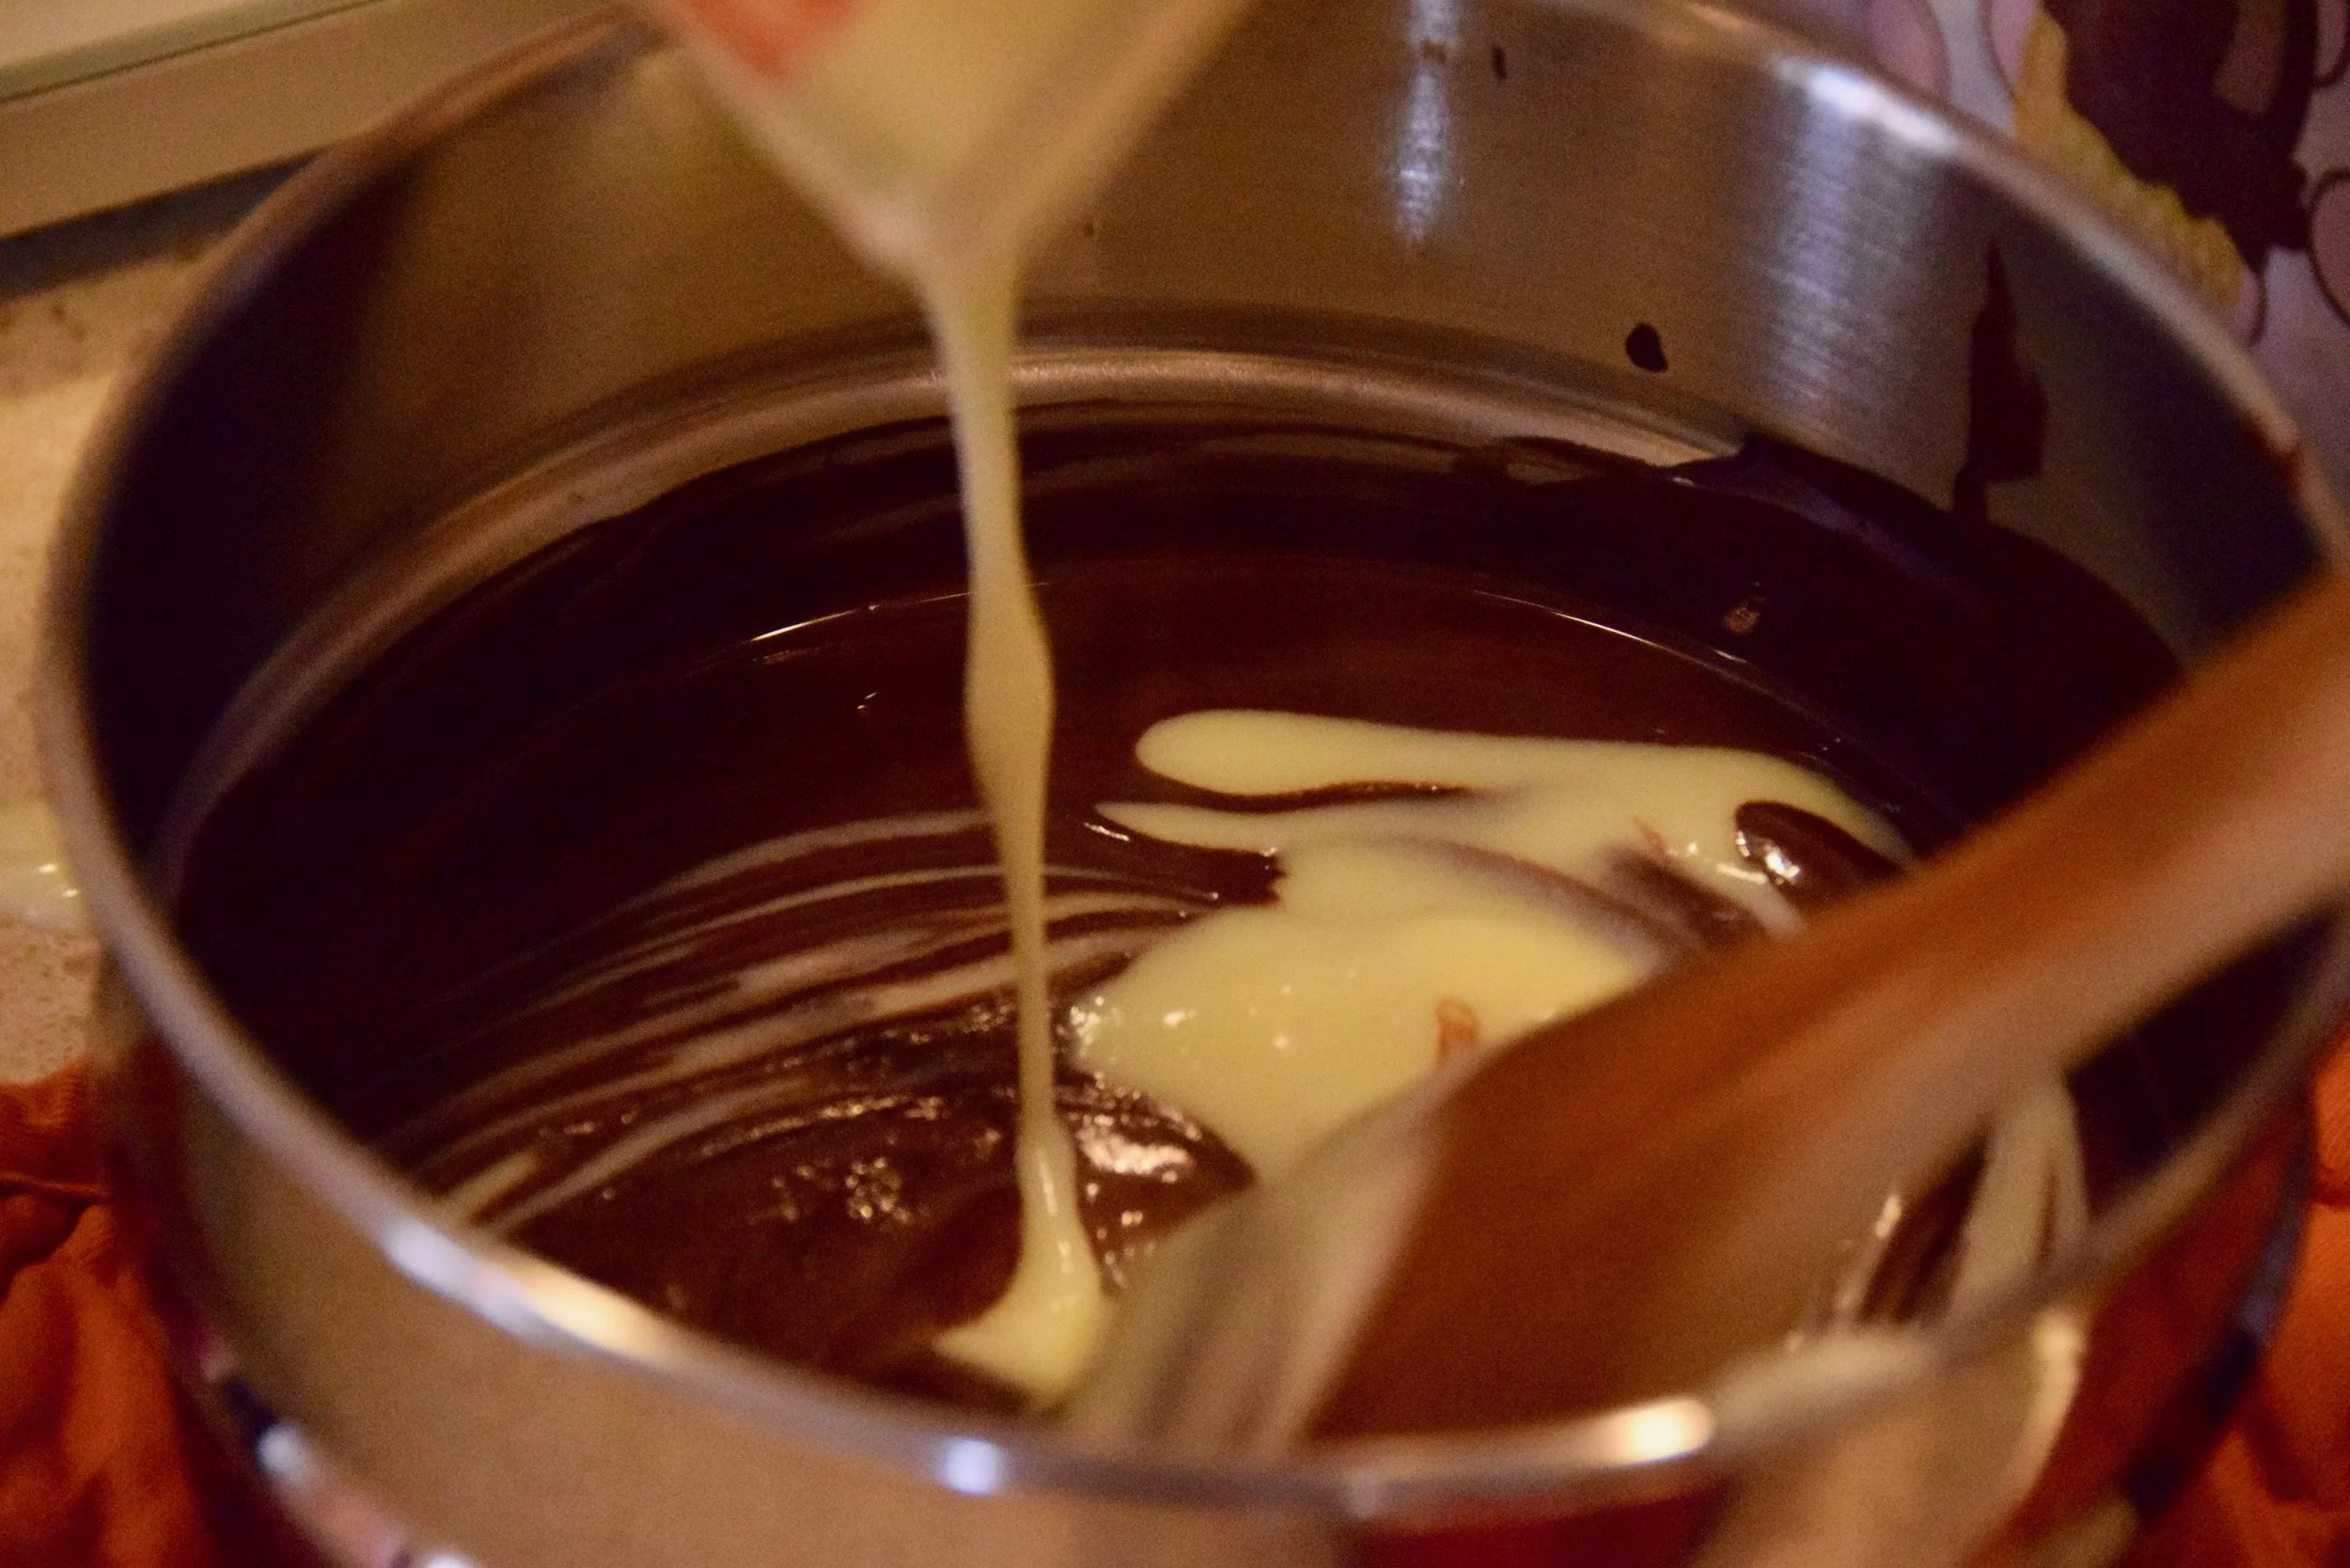
In order to make chocolate pudding, you need chocolate! While I conducted the steps above, I slowly melted bittersweet chocolate over a double boiler.

DSC_0988.jpg
DSC_0995.jpg
DSC_1006.jpg

To temper the melted chocolate, I added about a third of the hot vanilla pudding mixture to the chocolate and combined. I then added the tempered chocolate back to the vanilla pudding and whisked until combined. Then the pudding went into the refrigerator to chill.

DSC_0052.jpg
DSC_0070.jpg
DSC_0087.jpg
DSC_0093.jpg

4. Cut “Oreos” and bake

Let’s take stock for a moment of everything we have chilling. We started off with the “Oreo” dough which has been rolled out and chilled. We also now have our worms chilling in their molds and the pudding completed and cooling down. The “Oreo” dough has been chilling for a few hours, so it should now be stiff enough to cut and bake.

Taking the first slab of rolled dough out of the refrigerator, I removed both pieces of parchment paper and placed it on a lightly floured surface. Using a 2 inch circle cutter, I cut disks of dough and place them on a cookie sheet.

DSC_0101.jpg
DSC_0108.jpg
DSC_0115.jpg
DSC_0125 (1).jpg

After the cut disks chilled for an additional 20 minutes to firm up again, they were able to retain their shape when baked. You may be asking yourself, “Aren’t you just going to crush the “Oreos?” Why waste your time cutting perfect circles and not just put the whole rolled out piece of dough in the oven?” While it did occur to me that it was silly I was following the recipe so closely, I was worried about maintaining the characteristic snap of the chocolate Oreo cookie if I baked them in a larger size. Plus, I was just curious how closely the recipe would actually resemble an Oreo!

DSC_0153.jpg

// OVERNIGHT //

Step 5: Remove worms from molds, crush “Oreos,” and assemble Dirt Cups

To give the worms and pudding ample time to cool and firm up, I chilled them overnight. The next day, I prepped all of my materials for assembly. I removed my worms from their molds, crushed the “Oreos,” and skimmed off the surface of the pudding a slight skin that had formed.

DSC_0185.jpg

Assembling the dirt cups was quite fun! I purchased 6 oz square plastic cups so that the layers of “Oreo” and pudding were visible. The layers were as follows:

  1. Crushed “Oreo”

  2. Pudding

  3. Crushed “Oreo”

  4. Pudding

  5. Crushed “Oreo”

  6. Worm

DSC_0336.jpg
DSC_0323.jpg
DSC_0350.jpg
DSC_0325.jpg
DSC_0365.jpg
DSC_0326.jpg
DSC_0373 (1).jpg
DSC_0327.jpg
DSC_0382.jpg
DSC_0328.jpg
DSC_0401.jpg
DSC_0329.jpg
DSC_0332.jpg

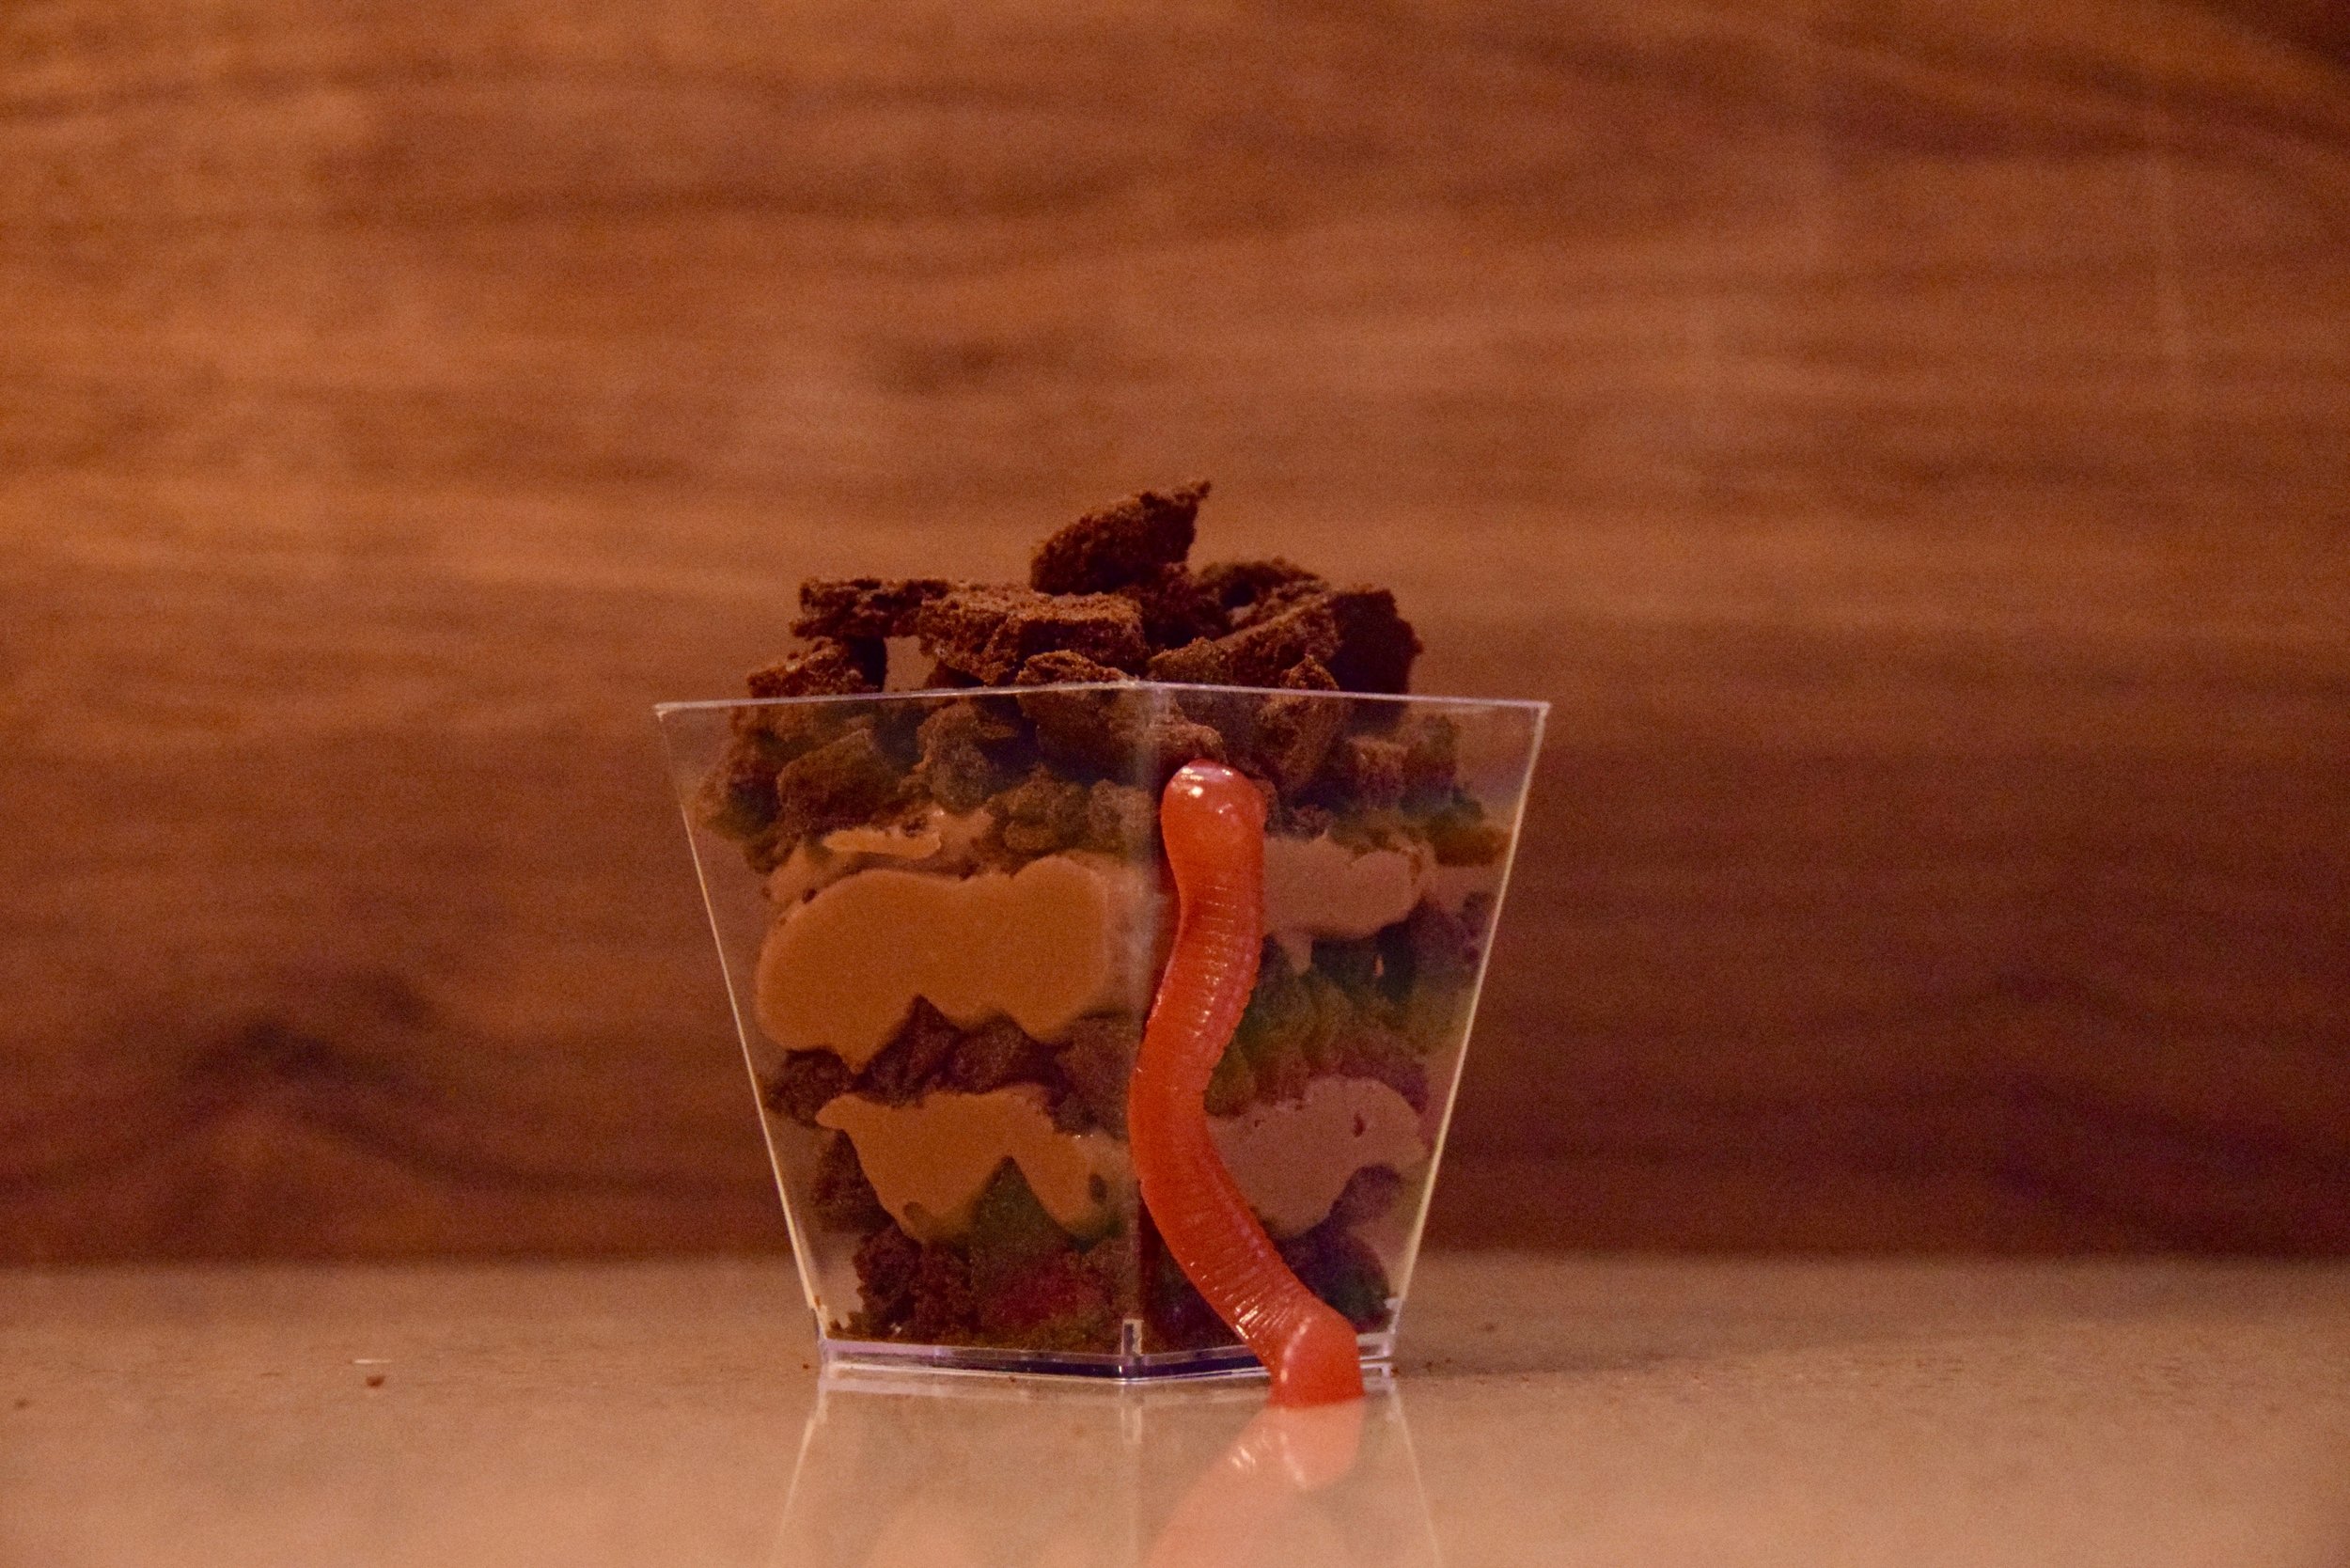
And there you have it. 100% from scratch Dirt Cups!

DSC_0424.jpg

Lessons Learned:

  1. To roll out the “Oreo” dough, I followed the recipe instructions as described, placing the dough between two pieces of parchment paper prior to rolling. If I were to repeat this recipe, I would consider rolling out the dough on top of a single sheet of parchment paper but leaving the top exposed to the rolling pin during rolling, similar to sugar cookies. I would then later top the rolled-out dough with a piece of parchment paper. I found it particularly challenging to roll out dough evenly between pieces of parchment paper, as dictated by the recipe. For me, the edges of the dough ended up thinner than the middle because I felt I had less control of the dough’s shape through the paper.

  2. I struggled a bit to pop my worms out of the silicone molds.

    1. I had actually made these worms once before and they popped out with no problem. I suspect that the amount of liquid puree I got out of these strawberries was more than the previous time I made them. As a result, the ratio of liquid to gelatin was higher and they did not gel as well. In the future I would plan to base the recipe not on 2 cups of cut strawberries but rather the amount of strawberry puree liquid.

    2. I read online that some lightly grease their silicon molds to help with the release after gelling.

Until next time…

Vanilla Macarons with Chocolate Ganache Filling

Baked: February 10, 2019

Recipe Source: The Scran Line (Nick Makrides)

Photo Credit: Daniel Beauboeuf

Hello! Long time no see. It has been over two months since I’ve posted on Crumb Boule! Between the holidays and moving to a new house (with an even better kitchen!), there hasn’t been much opportunity to bake. But I’m back with a new bake - Macarons! Macarons have been on my bucket list for a long time, so it was a natural next choice for a bake!

When I first thought about making macarons for this challenge, I immediately thought of Nick Makrides. Nick is the content creator of an instagram handle / website called “The Scran Line.” His account is an amazing, colorful library of icing-laden cupcakes, multi-layer super-stacked cakes, and, yes, macarons in every flavor imaginable! Not only are his creations creative and fun to look at, he is also a very enjoyable teacher of baking techniques to watch.

After I settled on slowly introducing myself to this new cookie by making Nick’s simple recipe for vanilla macarons, it occurred to me that there was likely a macaron recipe in the CIA Baking and Pastry book. Of course there was. However, after reviewing the recipe compared to the Scran Line recipe and watching (multiple times) Nick’s video tutorials on how to make macarons, I decided to use the recipe from The Scran Line. Thus you will find this bake (technically!) on the “Just for Fun” section of my blog. I do hope to one day also try the official CIA recipe and compare the outcome in my hands.

DSC_0903.jpg

I sure didn’t “mac-a-ron” choice when I decided to make macarons this week. Let’s get started!


The basic steps for making macarons are as follows:

  1. Mix the powdered sugar, almond flour and egg whites

  2. Make the meringue

  3. Combine the almond mixture and meringue

  4. Macronage

  5. Pipe into disks, dry and bake

  6. Assembly


1. Mix the powdered sugar, almond flour and egg whites

While reading up on making this mixture, I learned a few key tips:

  1. Make sure you use 100% pure powdered sugar, as most you find in the store is mixed with corn starch

  2. Sifting the powdered sugar and almond flour together at least 3 times is critical in order to achieve macarons with a smooth surface

The first step in making this mixture was to combine the almond flour and powdered sugar. I first sifted both ingredients separately into the same large bowl. Then I sifted them together three times.

DSC_0223.jpg
DSC_0231.jpg
DSC_0276.jpg

I next created a small indentation in the middle of the powered sugar and almond flour mixture, pouring in half of my egg whites. After mixing well, I added the rest of the egg whites and fully combined. I covered this mixture with plastic wrap and set it aside.

DSC_0323.jpg

2. Make the meringue

The next step was to make the meringue. In a saucepan fitted with a candy thermometer on the stove, I combined the granulated sugar and water, mixed lightly and began to heat the mixture. I also added by aged egg whites to my stand mixer, but did not yet start whipping.

IMG_4193.jpg

While we wait for my sugar syrup to boil, let’s talk about aging egg whites

Researching this recipe, I learned that there is a lot of controversy about the requirement to use aged egg whites in macarons. To age egg whites, the egg whites are separated from their yolks, placed in a bowl covered with hole-punctured plastic wrap, and refrigerated for at least 24 hours prior to use. This aging process relaxes the proteins in the egg whites and slightly dehydrates them. Many believe this allows for a more stable meringue to be created during whipping.

When my sugar syrup reached 230 degrees F, I started to whip the egg whites in the stand mixer. Then, when the syrup reached 244 degrees F, I poured the sugar mixture slowly down the side of the bowl while the egg whites continued to whip.

DSC_0346.jpg
DSC_0351.jpg
DSC_0375.jpg

I continued to whip until the meringue slightly arched at its peak when the beater was held upright. I returned the beater to the bowl and added the vanilla extract. Unfortunately, the vanilla extract caused the meringue to slightly droop. In the future, I would consider using gel extracts and colorings to avoid adding too much liquid to the meringue at this stage.

Before adding vanilla

Before adding vanilla

After adding vanilla

After adding vanilla

3. Combine the almond mixture and meringue

Next, I added the meringue to the almond mixture in three steps. First, I added ~1/3 of the meringue to all the almond mixture and mixed well. There is no need to worry about knocking the air out of the meringue. In fact, there will be a step later on when we try to get all remaining air bubbles out of the batter. I then added a second ~1/3 of the meringue and mixed well again. Finally, I added the last ~1/3 of the meringue, but only lightly mixed this time.

DSC_0434.jpg
DSC_0440.jpg
DSC_0452.jpg
DSC_0453.jpg
DSC_0449.jpg
DSC_0458.jpg

4. Macaronage

At this point, I was ready for macaronage, the step where the batter is mixed until it reaches the proper consistency for piping the macrons. The mixing motion is basically like folding egg whites. You first scrape the batter around the outside of the bowl in a circular motion, followed by punching through the middle of the batter. I did this several times before I started to check the consistency of the batter. You know the batter is ready when it drizzles off the side of the spatula, incorporating fully back into the batter below over the course of roughly 10 seconds. You want to catch the batter when it just reaches this state and not go past, so it is important to start testing the consistency frequently when you think you are getting close. I then transferred the batter to a piping bag fitted with a wide circular tip.

DSC_0460.jpg
DSC_0466.jpg
DSC_0467.jpg
DSC_0468.jpg
DSC_0475.jpg
DSC_0476.jpg
DSC_0574.jpg
DSC_0589.jpg

5. Pipe into disks, dry, and bake

DSC_0198.jpg

During my baking setup, I had created templates for piping the macrons. Using my one inch circle cutter I traced circles onto parchment paper. When I was ready to pipe the macarons, I flipped the parchment paper over so the trace side was facing down but still visible through the translucent paper.

I then piped the macron batter in circles, trying to generate a smooth surface without peaks. This was particularly difficult and many of the disks initially had peaks that eventually dissolved back into the batter as the disks spread out on the parchment paper. When all the disks were piped, I gently dropped each baking sheet on the counter to try to release any air bubbles still trapped in the batter.

DSC_0696.jpg
DSC_0697.jpg
DSC_0698.jpg

Next, I let the piped disks sit uncovered for 30 minutes. This steps allows the surface to form a shell of dried batter. If you compare the picture of the dried disks to the freshly piped disks, the dried disks have a more matte rather than glossy appearance. The disks are ready for the oven when you can lightly touch the surface without batter sticking to your finger. The amount of time you need to wait for this to happen depends on the humidity of your kitchen. On a more humid day it may take longer than 30 minutes. This dried shell on each disk is responsible for the characteristic ‘foot’ seen on macarons. Steam generated during baking cannot escape through the shell, causing the formation of the ‘foot’ as steam escapes through the bottom of the cookie.

DSC_0724.jpg
DSC_0730.jpg
DSC_0753.jpg

6. Assembly

After the cookies came out of the oven and fully cooled, it was time for assembly! I made a batch of dark chocolate ganache to fill each macaron. I’ve seen so many ways to pipe filling into macarons, but I decided to used a large star tip fitted on my piping bag. I piped the ganache in a circular motion, before gently placing the second cookie on the top of the ganache. The star tip pattern caused the ganache to squeeze out the edges of the macaron on a squiggly formation.

DSC_0923.jpg
DSC_0931.jpg
DSC_0917.jpg
edited.jpg
DSC_0882.jpg
edited.jpg

And there we have it! Vanilla macarons with chocolate ganache filling!

DSC_0895.jpg

Lessons learned:

  1. As I mentioned earlier, it may be a better idea to use gel coloring or flavoring so that it doesn’t dilute the meringue when added at that step.

  2. As I piped the batter, I felt the 1 inch template was much smaller than the size I typically think of for macarons, even after the batter spread. In the future I would probably use a larger template, maybe 2 inches in diameter.

  3. My macarons were not vary uniform in size and so I ended up size matching the cookies after they came out of the oven so that I could evenly pipe ganache during assembly. I ended up with what looked like ‘mommy and daddy’ macarons and ‘baby’ macarons. Next time, during piping, I will pay better attention to the height at which I am piping. Because the batter spreads, if you pipe a disk in the same diameter but different heights initially, eventually those that were piped with more height will be much wider in diameter.

  4. As I baked the macarons I didn’t have a good sense for how to know when they were done, so I just pulled them out at 12 minutes as the recipe described. I think mine ended up being a bit under done. I later read that you know the macarons are done if when you touch them in the oven they do not wiggle back and forth on their ‘feet.’

Making macarons was super fun and actually a pretty straight forward endeavor. I can’t wait to try making macrons again sometime with more exciting flavors or colors!

Until next time …

Haitian Pâté (Haitian Patties)

Baked November 4 and 5, 2018

Recipe Source:

Haiti Uncovered: A Regional Adventure into the Art of Haitian Cuisine (Nadege Fleurimond)

Where do I even begin with pâté? The first time I ever had pâté was on New Years Day a few years ago. While I was staying with my in-laws North of New York City, my father-in-law drove to Queens to pick up pâté for the family. Why would you drive all the way to Queens? Is it really that good?

I will admit that when I heard ‘pâté’ I believed he was bringing back what I had always thought of as pâté: a kind of spreadable loaf of liver I find completely gross. You can imagine my delight when instead he brought back small hand pies consisting of seasoned ground beef encased in puff pastry. So tasty! So was it worth driving to Queens? An emphatic YES! Since then, trying to make pâté has always been on my bucket list.

IMG_3745.jpg.jpg

Let’s get this pâté party started!

The first step was to make the puff pastry. There are likely many ways to make the pastry, but for this first attempt I followed closely the approached recommended by this specific recipe. I first combined salt, water and flour in a bowl and mixed with my hands until the dough came together.

IMG_3707.jpg
IMG_3710.jpg

I then dumped the dough onto a floured surface and kneaded the dough until it was firm and slightly sticky. I rounded the dough into a ball, wrapped in plastic wrap and let sit for 15 minutes to relax.

IMG_3712.jpg
IMG_3714.jpg

I next sliced the butter into smaller chunks and slices for more even incorporation into the dough to create the puff. After rolling out the dough to a quarter inch thickness, I evenly spread the butter on one half of the dough, folded the top flap of dough over and sealed the seams.

IMG_3716.jpg
IMG_3723.jpg
IMG_3724.jpg

To distribute the butter throughout the dough, this recipe called for an interesting approach. I first rolled the dough out into a rectangle, then bunched it back up into a ball, and then repeated the same steps a second time. I then bunched the dough back into a ball and let rest in the refrigerator overnight.

IMG_3725.jpg
IMG_3726.jpg
IMG_3727.jpg
IMG_3728.jpg

With the dough complete and resting overnight, I also made the filling the day before so that the spices could marinate overnight. There are many filling recipes for the patties. This recipe called for ground beef, diced onion, minced garlic cloves, diced shallot, diced scotch bonnet pepper, lime juice, salt, garlic powder, onion powder, coriander, ground cloves, thyme, rosemary and tomato paste. I couldn’t find scotch bonnet peppers at the store, so I replaced with a jalapeno. I first sauteed the vegetable and spices mix in a pan with olive oil and then added the ground beef. After it was cooked through, I added the tomato paste to taste. I threw in a few red pepper flakes for good measure (it is a bad habit I have for everything I cook!). I took the picture below of all the veggies and spices before I started to cook. I thought the mixtures of colors was just so pretty!

IMG_3729.jpg

The next day it was time to fill and bake the patties! I first rolled out the dough one more time into a thin rectangle. I then cut the edges to create even long and narrow rectangles. The rectangles were twice as wide as tall such that when I would later fold over along the short edge, the final pastry would be rectangular.

IMG_3735.jpg
IMG_3736.jpg

To fill the patties, I put about a tablespoon of filling on one side of the rectangle of dough, folded over along the short edge, and then crimped the seams closed using a fork. After filling all the patties, I baked them in the oven until golden brown and flaky!

IMG_3739.jpg
IMG_3740.jpg
IMG_3741.jpg
IMG_3743.jpg
IMG_3746.jpg

Lessons learned:

  1. I wasn’t very pleased with the flakiness that resulted from this method of incorporating the butter into the dough. Next time I make this recipe, I will likely take a more traditional approach to lamination. I plan to add the butter to the dough, roll it out, fold into threes and repeat twice to create more even distribution of the butter. I will skip the step of bunching the dough back into a ball.

  2. Next time I will try harder to find scotch bonnet peppers or at least use a couple habaneros for the filling. Reading more about the scotch bonnet pepper, I learned it is quite hot (about 2x hotter than a habanero and about 50x hotter than a jalapeno!!) and tends to bring out a fruitier flavor than other peppers.

  3. While the crust ended up flaky, it never really achieved the golden brown look I was looking for. Next time I will plan to coat the patties with a light egg wash before they go in the oven.

  4. I was worried about the crust not baking through, so I definitely over-baked these patties. The bottom of the patties ended up somewhat hard and tough. I’ll note to more closely monitor the base of the patties as they bake next time.

    Until next time…

BIRTHDAY BAKE! Yikes, I'm 30.

Baked on June 10, 2018 (...while I was still 29...)

Pink Striped Vanilla Cake with Buttercream Flowers

Recipe Sources:

  • Vanilla Cake, The Scran Line (Nick Makrides)

  • Wilton American Vanilla Buttercream Frosting recipe

Yes, you read correctly. On my 30th birthday I baked my own birthday cake. But honestly? I wouldn't have had it any other way. It was truly a treat to myself to spend each evening the previous week thinking about the design for this cake and then spending 11 hours on a Saturday baking it. I was so tired from making it that we ended up eating it for breakfast on Sunday instead, but it was 100% worth it!!!

Even before I decided to make this blog an official endeavor, I was trying to challenge myself to learn new baking techniques. One aspect of baking I have always thought was so beautiful is buttercream flowers. I am WAY too chicken to try to pipe flowers directly onto a cake, so I was thrilled to learn from YouTube that one option is to pipe flowers onto wax paper using thick American buttercream, freeze them for a few minutes and then peal and place onto your cake. The outcome is stunning and gives you the freedom to rearrange the flowers if needed while they are still cold enough to handle.

Let's put the "petal" to the metal and get this buttercream flower cake started!

IMG_2731.jpg

While externally the focus of this cake would be the piped butter cream, I wanted the inside to be a surprise as well. To make this happen, I wanted to create vertical white and pink stripes in the batter. My first step was to make vanilla cake batter, split in two, and dye one portion pink.

IMG_2701.jpg


In my search through YouTube videos, many "Pride Rainbow" Cake recipe videos used a technique of piling globs of differently colored batter on top of each other that eventually would spread out in the pan into a rainbow pattern. Stealing this idea, my first attempt at this cake was to use this technique with alternating white and pink colored batter. Let's just say that this technique did NOT work for me because I could not get the batter to spread to the edges of the pan without mixing together into a pale pink. This photo is not shown here because it was so disgraceful I didn't even TAKE a photo!

STARTING OVER  . . .

My next thought was that batter so thick could potentially hold it's shape while other batter was added around it. I made another batch of batter and then attempted to first put a glob of pink batter in the center, then use a large spoon to add dabs of white batter around this pink blob, and then add dabs of pink batter around the ring of white batter to the edges of the pan. To make for interesting layers to the cake, I reversed the order of the colors in the other round pan, starting with white in the middle. This technique worked much better than my first attempt and into the oven these pans went!

IMG_2702.jpg

After removing these pans from the oven and cooling, I stacked the layers onto a cake board and frosted with Italian Meringue Buttercream. I had some buttercream leftover, so I dyed it pink and piped small balls around the bottom of the cake.

Screen Shot 2018-08-22 at 11.30.51 PM.png

Speaking of buttercream, it should be noted that there is a significant difference between American and European styles of buttercream.  American butter cream is far sweeter and uses a ton of powdered sugar, compared to its European counterparts. When it comes to European style buttercreams, I often opt for the Italian style because I find it much easier to prepare and it is slightly sweeter than the Swiss style. In Italian buttercream, you start whipping your egg whites and then add boiling sugar water to the mix, cooking the egg whites while they whip into peaks. You then add chunks of butter when the mixture is cool to whip into a frosting. In the Swiss style, you cook the egg whites in the double boiler before whipping into the frosting. As someone who has, on multiple occasions, turned  the egg-based topping for German Chocolate Cake into scrambled eggs on the stove, you can understand why Swiss buttercream scares me. In addition, many online have mentioned that the Italian style is easier to pipe.

The next step was to create the light and dark pink American buttercream flowers and green leaves to place on top of the cake. To make the roses, I dabbed a blob of frosting onto a large flower nail and placed a square of parchment paper on top to secure to the nail. Then, using a tapered tip attached to a piping bag I first piped a blob of frosting in the middle of the nail, and then added "petals" around the blob. The first ring contained three petals, the next ring with five and the last ring with seven. The thin part of the tapered tip was facing upwards to create thin edges to the petals. On some of the flowers, I added small dots of yellow frosting in the center. I practiced a few other flower variations as well. Note that it was important to use pretty thick American buttercream to ensure that these flowers could hold their shape, even before going into the freezer.

IMG_2718.jpg

I also wanted to create leaves to distribute among the flowers to break up all the pink colors. To create a two-toned look to these leaves, I first fitted a piping bag with the same tapered tip and fill it on the side with the thin portion of the tip with dark green frosting. The other side was then filled with the lighter green frosting. Next, I piped leaves by using a semi-circle swooping motion with the thin part of the tip staying on the inside. I then popped the flowers and leaves into the freezer for a few minutes to firm up.

IMG_2719.jpg

It only took a few minutes in the freezer for the flowers and leaves to be firm enough to handle. Pealing away the parchment paper from each, I started to place the flowers onto the top of the cake. After placing all the flowers, I interspersed the leaves among the flowers and made other rearrangements as needed to cover the whole cake.

IMG_2739.JPG

At this point the cake was done, so the only thing left to do was eat! Cutting into the cake, the striped pink and white layers turned out exactly how I hoped. The lines between the two colors were very well defined.

IMG_2734.jpg
IMG_2737.jpg

30 was a good birthday and this cake was part of it. Here's to a fantastic 30th year!

Until next time . . .

SUPER BOWL!

Baked on February 4th, 2018

Recipe Sources:

  • Yo's Ultimate Chocolate Cake (Yolanda, Gampp, How to Cake it)

  • Yo's Famous Italian Meringue Buttercream

Hosting  a Super Bowl party this year was a perfect excuse to bake a GIANT cake! Neither of the two teams I root for (Green Bay Packers and Seattle Seahawks) were in the game, so there were no pre-game nerves to knock me off my baking game. For those who are football fans, you may be scratching your head wondering how in the world I could root for those two teams. Yes, I own a cheesehead and yes I own a Russell Wilson jersey, but I do keep them separated in my closet to avoid fighting. The Green Bay Packers are my #1 due to home state pride, but I couldn't help falling in love with the 12th man while living in Seattle. That said, some how I just couldn't bring myself to like Tom Brady when I lived in Boston ... but I digress. After doing some extensive google image searching for football themed cakes, I landed on a design for a football stadium I thought was feasible to make.

It's time to make a SUPER cake for a SUPER bowl!

This creation required:

  • Two 9" x 13" chocolate sheet cakes
  • Two batches of the Italian meringue buttercream
  • Sprinkles
  • Fondant for the letters  


After baking the two chocolate cakes, I first leveled the cakes to be the same height. I then cut the first cake into two pieces: one 9" x 9" and one 4" x 9" slice. The second cake was cut into seven pieces: one 4" x 9" slice, two 2.5" x 9" slices, and four 1" x 9" slices.

To make the basic structure of the cake, I placed the two 4" x 9" slices on either side of the 9" x 9" cake. Using vanilla buttercream as the glue, I then stacked the the two 2.5" x 9" slides on either end and two 1" x 9" slices on top of that. The remaining two 1" x 9" slices were used as two side 'fences' to what would become the football field. Using a serrated knife, I carved the two towers on either end at and angle down to the top of the fence. Lastly the whole outer surface was covered in buttercream that I colored light gray to resemble concrete.

Next it was time to sod the field and fill the stadium with fans. To create the fans, I carefully patted rainbow sprinkles onto either side of the incline, trying to maintain a rectangular shape. Plastic wrap left in the middle of the cake caught many of the sprinkles that escaped the stands. When this was complete, I used a star-tipped piping bag and green buttercream to pipe on lines of grass to field. Lastly a small round piping tip was used to pipe on ten yard lines and "50" on each side of the center of the field. I'll be the first to admit that I need to work on having a more steady hand with a piping bag; the lines turned out pretty squiggly.

The last step was to make it clear this wasn't just any stadium, but the SUPER BOWL stadium. I colored some fondant yellow and used cookie cutters to cut out the letters to spell "SUPER BOWL" and "LII" on each end of the cake.

This was a super fun cake to make, and the chocolate cake recipe from How to Cake It was SOO tasty. I would definitely recommend the recipe even for more traditional cakes.

Until next time . . .

Source: https://howtocakeit.com/