
Baked on December 2, 2018
As the holidays approach, you may be thinking I should blog about my favorite holiday recipes. Don’t get me wrong… there will be plenty of holiday cookies in my life this year, including the Cieslewicz family favorite, Melting Moments. In fact, as I write this blog post I am waiting for my Melting Moments dough to chill before rolling it out.
However, living in California makes it REALLY hard to get in the Christmas spirit. It feels fundamentally wrong that it could be 60 degrees in December… that we could easily head outside and grill up a brat or go for a balmy hike. Every time I see Californians wearing scarves, gloves and mittens in 60 degree weather, I grimace. Can you really be that cold?
So then, what is a more appropriate California Christmas bake than something you’d associate with a summer vacation in the midwest? S’mores of course!
Baking this Chocolate Peanut Butter S’mores cake was by far my most ambitious bake to date. This cake is made up of six components, five of which I had never made before.
Graham cracker crust
Chocolate Peanut Butter Gianduja
Flourless Chocolate Sponge
Chocolate Bavarian Cream
Marshmallow
Milk Chocolate Glaze
On first glance, the recipe in the CIA book looks simple. “Layer these components… apply the Bavarian cream…” However, you quickly realize that each component is its own recipe with additional sub-recipes. To make the Bavarian cream, I needed to also make vanilla sauce! Prior to starting this cake, I looked through each recipe in detail and wrote out on paper the order in which I should make the components so they were ready at the proper time for assembly. I also made a diagram of the cake assembly to make sure each piece wound up in the right place. Both of these documents were key and kept me on track during this 11 hour marathon bake (don’t worry… there was a 6 hour chill period in the middle).

The holidays can be stressful, but you “butter” just “mallow” out. Come bake with me and spread “s’more” holiday cheer!
Step 1: Make the Flourless Chocolate Sponge
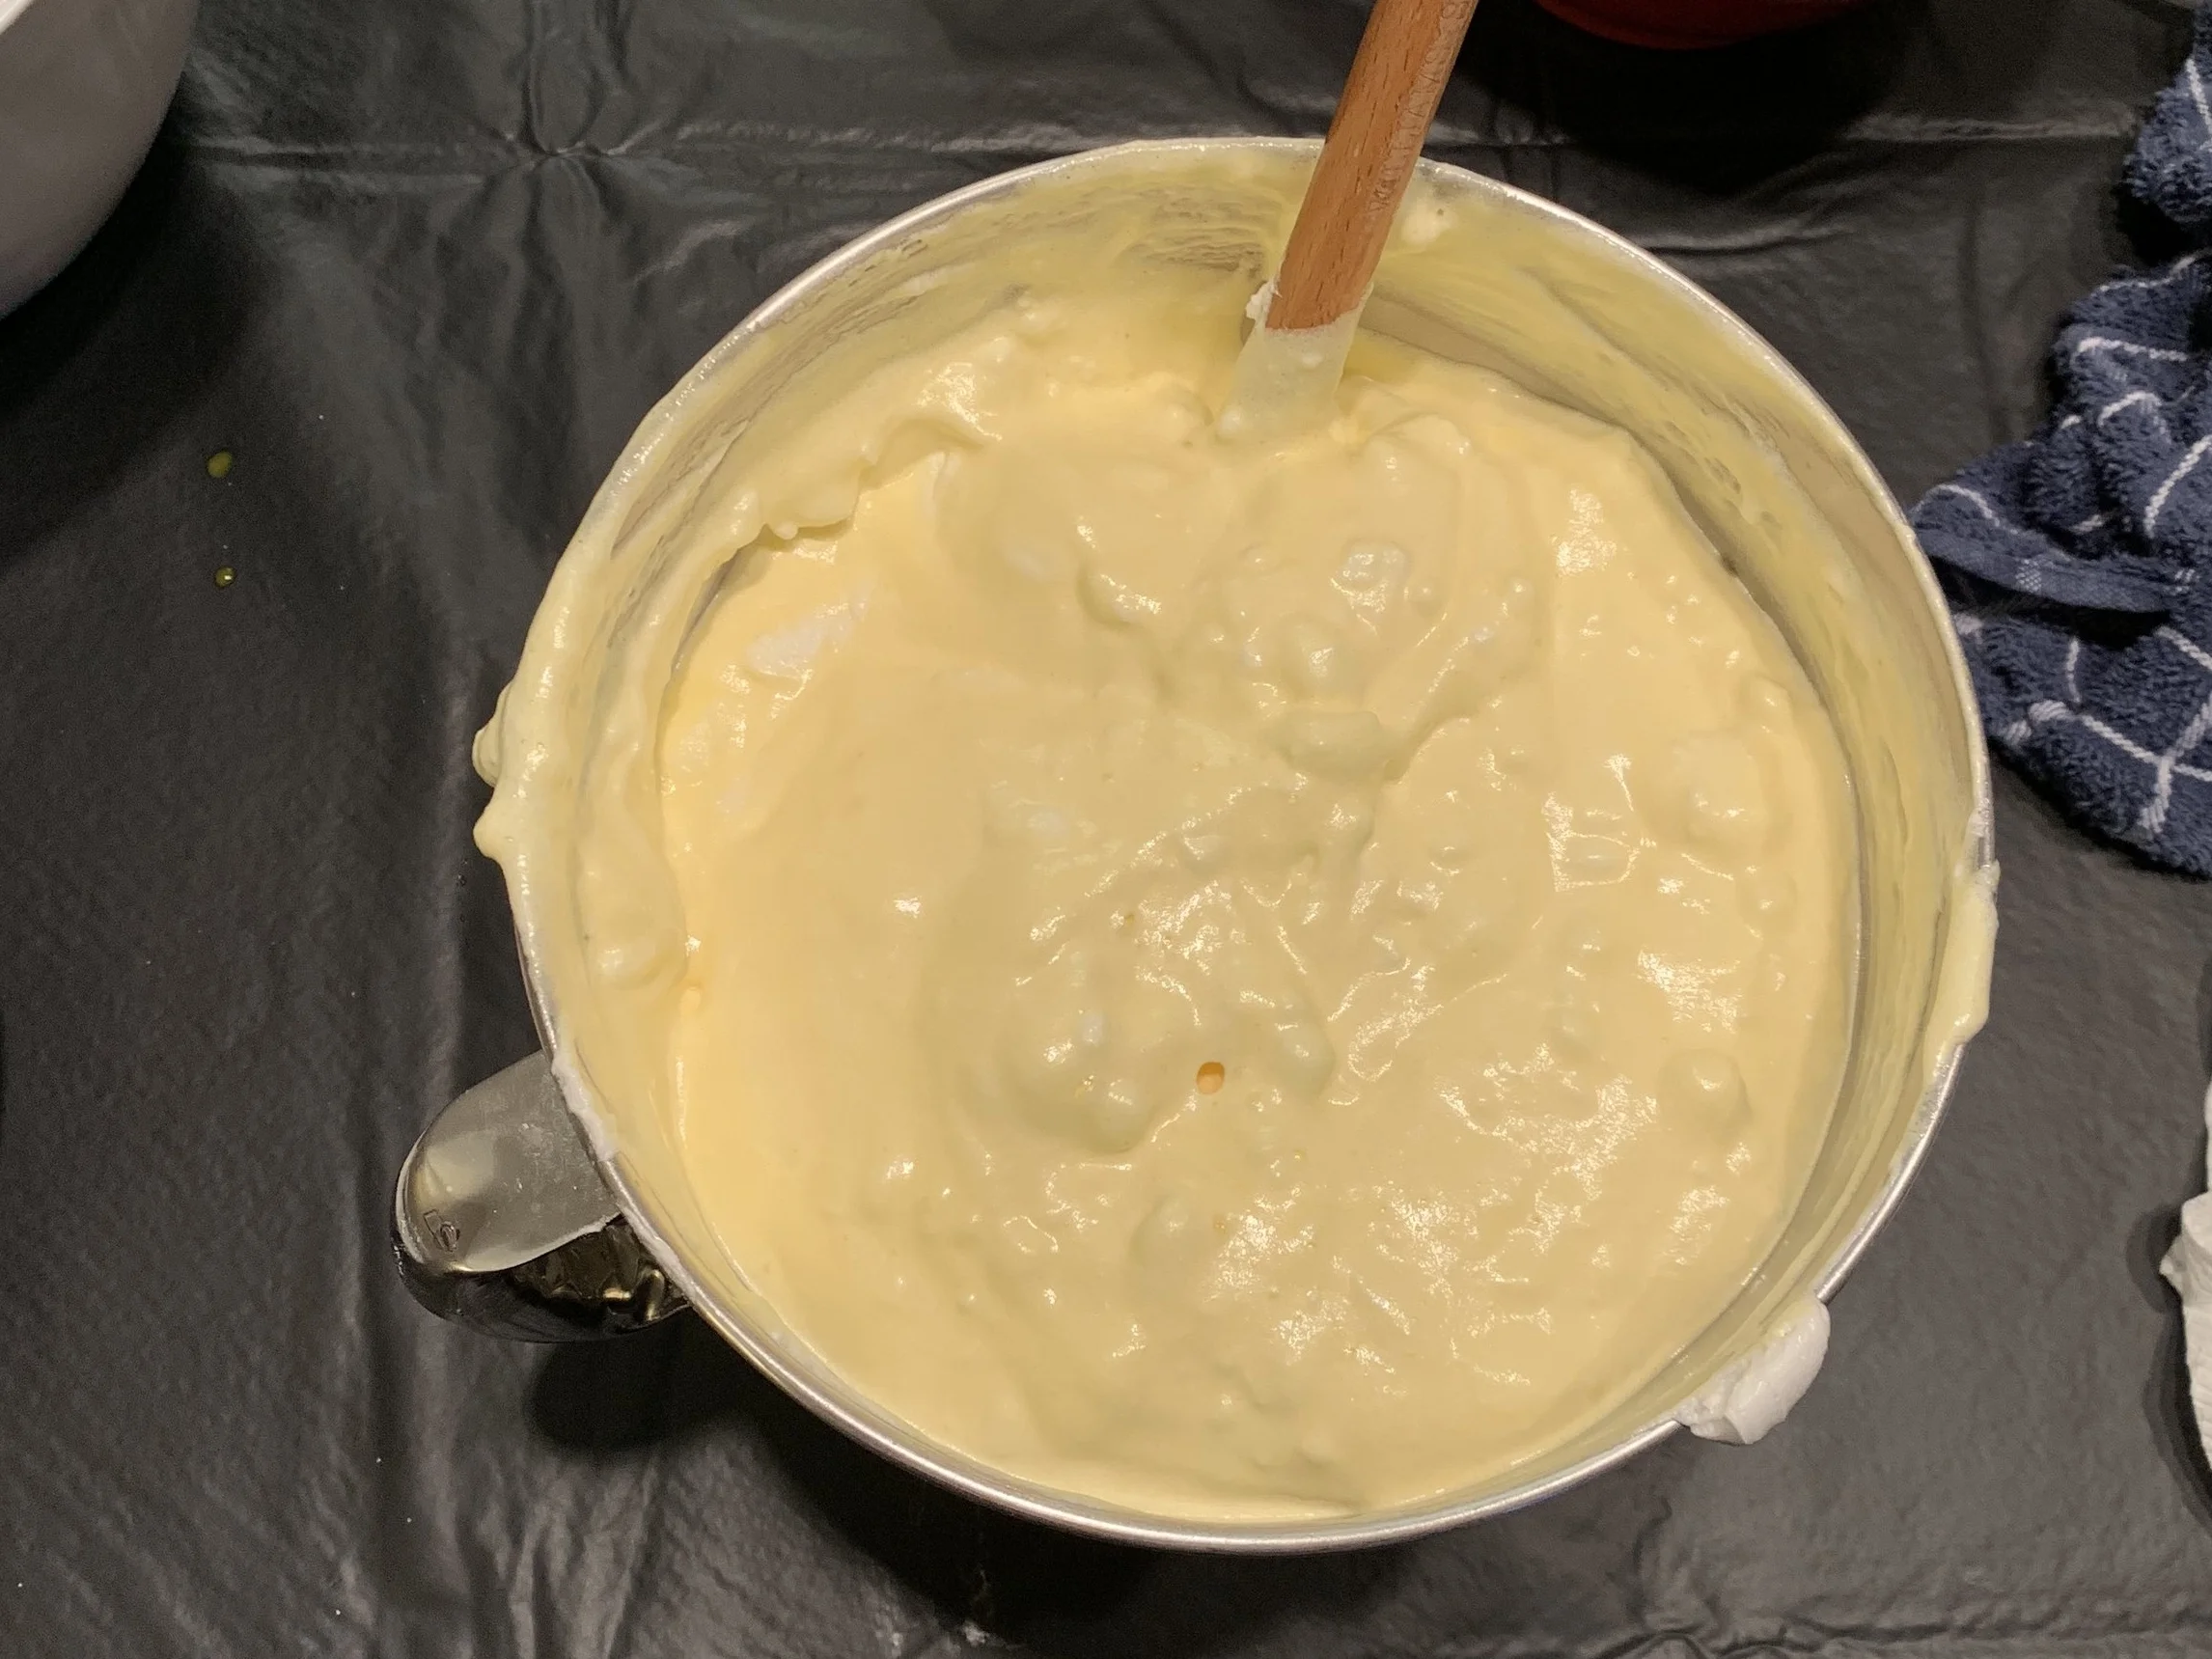
This flourless sponge recipe calls for egg yolks, salt, vanilla extract, egg whites, sugar and Dutch-process cocoa powder. The mass of the egg yolks and whites needed to be in equal proportion in the recipe, but an egg is about 1/3 yolk and 2/3 white. This took careful separation and weighing to get just right. Furthermore, you will notice that in addition to no flour, there is also no leavening agent like baking powder or soda. The rise in this sponge comes from air beaten into the whites and yolks separately and so it was important to take care to not knock out any air while mixing components together.

The first step was to basically make a meringue by whipping the egg whites while slowly adding the sugar until stiff peaks formed. I then needed to set these egg whites aside while I whipped together other ingredients. I only have one mixing bowl for my stand mixer and so I needed to transfer these egg whites to another bowl in order to continue the recipe. This made me extremely nervous about knocking out air pockets in the whites while I transferred them to another bowl. Having a second bowl for my stand mixer would have been ideal (wink wink to a particular husband who may be reading this and is looking for Christmas gift ideas…).


After cleaning out my bowl and whisk attachment, I whipped together the egg yolks, vanilla and salt until the color of the yolks turned a more pale yellow. I then gently mixed about 1/3 of the egg whites into the egg yolks until fully incorporated before gently folding in the rest of the egg whites. The last step was to fold in the cocoa powder, which had been sifted. Every time I think of folding, I can’t help but have Julia Child’s voice enter my head on repeat with each stroke: “Through the middle, and round the outside!” When I felt the dough was thoroughly mixed with no chunks of egg white left, I spread the dough on a full sized sheet pan lined with parchment paper. I baked the cake until it just sprung back when pressed in the middle.


Step 2: Make the Chocolate Peanut Butter Gianduja
What is Gianduja? Before making this cake, I had never heard the term used. It is an Italian word describing a chocolate paste that is about 30% hazelnut paste. In fact, the famous chocolate spread, Nutella, was originally called Pasta Gianduja before it was reformulated to be so spreadable. For this cake, the main components of Peanut Butter Gianduja should be pretty predictable based on the name: Melted Milk Chocolate and Creamy Peanut Butter. The third ingredient is a small amount of trimoline, sometimes also called invert sugar, which is a very very sticky and dense sugar syrup.
Making the gianduja was quite straight forward. Using two double boilers, I separately melted the milk chocolate chunks and warmed the peanut butter. When both were smooth, I combined them and then added the trimoline. After throughly combined, I transferred the gianduja to a tupperware container and set aside. This chocolate peanut butter paste was so tasty! We continued to eat it for days spread on graham crackers.


Step 3: Make the Graham Cracker Crust
This recipe originally called for me to make a very traditional graham cracker crust consisting of graham cracker crumbs, light brown sugar and butter pressed into a 6” mold and baked. I’ve made this type of crust before in pies and cheesecakes. In fact, my favorite recipe, Grandma’s cheesecake, calls for a modified version using granulated sugar instead of brown sugar. However, pies and cheesecake have the luxury of their pie plate and springform pan to maintain the shape of the crust during baking, with the filing then helping the crust to hold its shape while eaten. Given the amount of assembly required for this s’mores cake, I was worried from the start about the structural integrity of this graham cracker crust, and I was right. After making the crust once, it would simply crumble when handled. There was no way it would make a nice layer inside the assembled cake.
Starting over, I made the same recipe again, but this time added an egg yolk and a bit of the egg white until the crumbs came together and could hold their shape in a ball. I then pressed the crumb mixture evenly into a 6” mold. I used the flat side of a meat tenderizer to get a flatter surface on the crust. After baking for about 10-15 minutes until it seemed cooked through, I cut a circle of a smaller diameter while it was still warm and then removed the mold and these trimmed edges. It will become clear a bit later why I needed the disc of graham cracker crust to be slightly smaller than the mold.


Step 4: Make the Marshmallow Ring and Marshmallow Drops
The forth layer of this cake is a disc of marshmallow, requiring me to make marshmallow fluff, pipe it into a ring and the then freeze for 20 minutes to set its shape. This marshmallow recipe called for granulated gelatin, granulated sugar, glucose syrup, honey, and vanilla extract.
The first step is to make a sugar syrup consisting of the granulated sugar, glucose syrup (basically a non-flavored corn syrup), honey and water. I stirred these ingredients in a saucepan over high heat, bringing them to a boil. I let the syrup continue to cook without stirring until it reached 252 degrees F and then removed from the heat.


While the sugar syrup cooled, I bloomed the gelatin in water and then melted it in a double boiler. Off the heat, I mixed the vanilla extract into the gelatin. When the sugar syrup reached 210 degrees F, I added the gelatin / vanilla mixture and began to whip the mixture on the stand mixer. I continued to whip until medium peaks formed.


While the marshmallow was whipping, I traced a 6” circle onto the backside of a piece of parchment paper for a template and then sprayed the front of the parchment paper with some cooking spray to prevent sticking. I then filled a piping bag fitted with a large round tip with the marshmallow fluff and piped a disc just slightly smaller than the 6” circle. I also piped a couple swirly blobs of marshmallow I planned to use later for cake decorations. This tray then went into the freezer until I was ready for cake assembly.


Step 5: Assemble the Graham Cracker Crust, Gianduja and Cake Layer
The graham cracker crust, gianduja and flourless cake layers are assembled together outside of the cake mold so that they can later be pressed all at once together into the mold.
The first step was to spread the gianduja onto the graham cracker crust. I then used the cake mold to cut out a 6” round of the flourless chocolate cake. Similar to the graham cracker crust, this was then trimmed to a diameter slightly less than 6” before being pressed on top of of the gianduja layer. I set this assembled stack aside while I moved on to making the Bavarian cream.


Step 6: Make the Chocolate Bavarian Cream
The Bavarian cream will ultimately fill in the space between two layers and the edges of the cake when applied inside the 6” cake mold. Gelatin and chilling helps to stabilize the cream so that it holds its shape. Because the cream contains gelatin, it was important to have everything ready to go to fill the cake before starting to make the cream. In addition to the assembly of the graham / gianduja / cake stack, this preparation included setting the 6” mold on a sheet pan atop a sheet of acetate.
To make the Chocolate Bavarian Cream, the first step was to whip the cream into soft peaks, cover and set aside in the fridge for a later step. Next, I made the vanilla sauce with added melted chocolate. The vanilla sauce calls for milk, heavy cream, salt, sugar, egg yolks and vanilla extract. I first combined the milk, cream, salt and a portion of the sugar in a saucepan and brought them to a boil, stirring. Meanwhile, in a separate bowl (not over heat) I blended the egg yolks and remaining sugar with a whisk.


I tempered the egg yolks by adding about 1/3 of the hot milk mixture to the egg mixture and whisking, before then adding the egg / milk mixture back to the milk mixture and cooking until it could coat the back of my spoon. While the sauce cooled, I passed it through a sieve to remove any lumps and then mixed in the vanilla. I then added about 1/3 of the sauce to melted chocolate, mixed and then added back to the rest of the vanilla sauce to completely combine.


I next bloomed sheets of gelatin in water, squeezed out any excess water and melted the gelatin over a double boiler. While the vanilla/chocolate sauce was still warm, I added the gelatin to the vanilla sauce and then passed the sauce through a sieve once more to remove any chunks of gelatin. I mixed 1/3 of this vanilla / chocolate / gelatin mixture into the reserved whipped cream, and then folded in the remaining sauce to complete the Chocolate Bavarian Cream. With all of my components ready, it was now time to quickly assemble the cake into the mold before the gelatin set too much in the cream.

Step 7: Fill the Cake Mold
If you recall the diagram I created for myself at the start, the assembly of this cake is as follows:
Layer half of the Chocolate Bavarian Cream into the bottom of the cake mold.
Sprinkle the top of marshmallow round with graham cracker crumbs and press the round (crumbs side down) into the layer of Bavarian cream. Allow the Bavarian cream to come up the sides of the marshmallow round.
Layer the remaining Bavarian cream into the mold, making sure the layer is even.
Press the graham / gianduja / sponge sandwich sponge side down into the Bavarian cream. Keep pushing with even pressure as the Bavarian cream comes up the sides of the sandwich.


From here the cake went into the freezer for 6 hours to firm up. You will notice that the graham cracker crust is elevated above the top of the mold. As I pushed down I felt like I was starting to meet too much resistance and I worried about cracking the graham cracker crust. However, you will notice later when the cake is sliced that the layer of Bavarian cream inside the cake is pretty thick, so I probably could have gotten away with making it more flush with the top of the mold. This would have made the cake more aesthetically pleasing, but the cake also worked out this way too.
- - CHILL at least 6 hours - -
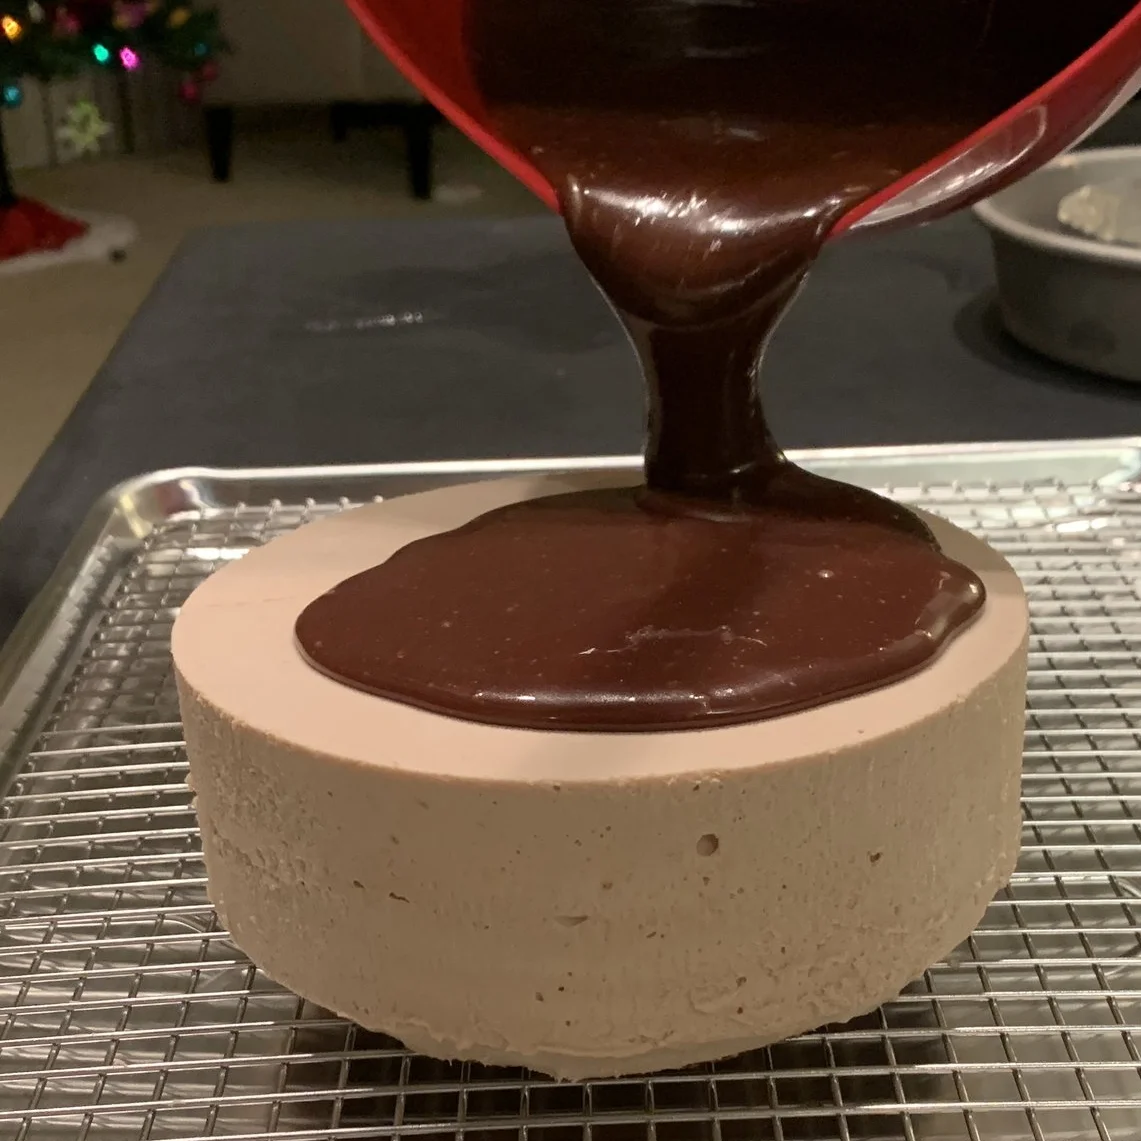
Step 8: Make and Apply the Chocolate Glaze
The milk chocolate glaze calls for gelatin, milk, glucose syrup, chopped milk chocolate and pate a glacer, blonde. Pate a glacer is a compound chocolate that doesn’t need to be tempered and can help give your chocolate glaze a glossy sheen. To make the chocolate glaze, I first bloomed the sheets of gelatin in water. I then mixed the milk and glucose syrup together, bringing them to a boil. After squeezing out the excess water, I melted the gelatin in the hot milk and glucose liquid. I then poured the hot milk / glucose / gelatin mixture over the chocolates and stirred until the chocolates melted. While the recipe did not call for it, I did pass this chocolate mixture through a sieve because I felt the gelatin had left a few lumps.
With the chocolate glaze cooling to a useable temperature, I removed the cake from the freezer. I flipped the cake over so that the graham cracker crust was on the bottom and placed the cake on a cooling rack set inside a sheet pan. I applied a dishcloth dampened with hot water to the outside of the mold in order to slightly warm the sides of the cake so that the mold could be removed. The acetate that was formerly on the bottom side of the cake was also removed. With the mold now removed from the frozen cake, you will see the purpose of making the internal layers slightly smaller in diameter than the mold. This allowed the Bavarian cream to completely envelop the layers in the mold, so that when unmolded the entire exterior of the cake is clean, sharp lines of Bavarian cream.


When the chocolate had cooled to 85 degrees F it was now ready to be glazed onto the cake. Starting in the middle of the cake, I worked by way around in circles to allow glaze to pour down the sides of the cake. I then popped the cake in the fridge for about an hour for the glaze to firm up before transferring it to a cake board and allowing to refrigerate overnight.


To finish off the cake, I placed four marshmallow swirls dusted with graham cracker crumbs on top of the cake… by far the easiest step!


Lessons learned:
When making the sponge, my beaten egg whites were a tad too stiff. When folding them into the egg yolk mixture, it left some chunks of egg white that were difficult to incorporate. Next time, I will try to beat my eggs just to soft peaks.
Even after time in the freezer, my marshmallows still remained a bit more like fluff than solid marshmallows. Reading up more on this topic, I learned that the longer you beat the marshmallow the more hard and chewy they will be. Some also even add egg whites into the mixture to give the marshmallows more internal structure and a fluffier consistency.
This marshmallow recipe called for the use of honey. When completed, I felt the marshmallows tasted too strongly of honey. The peanut butter and chocolate tastes of the cake were too strong for me to notice the honey when the full cake was assembled, but if I were to make marshmallows again for other uses I would look for a recipe that doesn’t use honey. I would have preferred a really strong vanilla flavor.
You probably noticed that many items went through a sieve multiple times to remove lumps. A key item I will remember next time is that each time you filter your sauce, you will loose a little bit. It’s important to plan ahead and make more than you will need.
For the marshmallow ring, the recipe originally called for dusting the marshmallow with the graham cracker crumbs before it chills in the freezer. I completely forgot this step. However, my marshmallows (as mentioned in #2) were still pretty sticky after coming out of the freezer and so application of the crumbs at that time still worked. I would imagine that if I repeated the cake in the future with a more chewy marshmallow this may not be the case.
I briefly touched on the height of the cake in my description above. It definitely would have looked prettier had I kept pushing the graham / gianduja / sponge layer further into the Bavarian cream.
Overall, I think the layers look pretty good for my first attempt. However, I do notice some inconsistencies like the marshmallow being wider than the other layers or the gianduja being spread thinner in the center. As I practice more, I hope to become more consistent with layering.
When pouring the glaze over the cake, setting the cake on the cooling rack worked pretty well. However, when I removed it from the rack the glaze did pull a way from the cake in a few places. Another technique I’ve seen is to put the cake on top of a circular cake pan or other object that is slightly narrower in diameter than the cake. That way when the glaze flows down the sides, it is not contacting both the cake and the surface it sides on at the same time.
My chocolate glaze appears to have many more air bubbles than I liked. To get that really pretty glossy look, it should be air bubble free! I looked a bit more into this and read a few recommendations to use an immersion blender on the melted chocolate to make it really smooth. It is recommended to keep the blender fully submerged in the chocolate in order to avoid air bubbles. It is also recommended to pass the chocolate back through a sieve afterwards as well.
- Until next time -