
Baked: March 29, 2020
Photo Credit: Daniel Beauboeuf
As we all huddle at home to fight COVID-19, many people are turning towards activities they can do indoors to pass the time or keep the kids occupied. Many are turning to baking, causing a run on eggs, butter, and yeast, among other baking needs, at the grocery store. I am extremely embarrassed to admit that I actually paid $15 for a dozen eggs to be delivered from Whole Foods for this bake, just because it was the only way I could get eggs! Although this is a stressful time, it is a fantastic excuse to do more baking for this blog… but perhaps I am now baking too much? As of this writing, I am actually backlogged on blog entries! It turns out it takes less time to make and eat the treats than to write up these posts. What’s more, now I have no one to give these treats to. I used to force my husband to take them to work and feed his team, so now I have to get creative. This week, I made Pecan Passion tartlets and dropped a few off at a friend’s house just so I wouldn’t eat them all.

PE-CAN survive through COVID-19!
Let’s get started!
There are multiple steps to making Pecan Passions:
Bake the tartlet shells
Make the soft caramel filling
Make the soft ganache filling
Assemble the tartlets
Step 1: Bake the tartlet shells
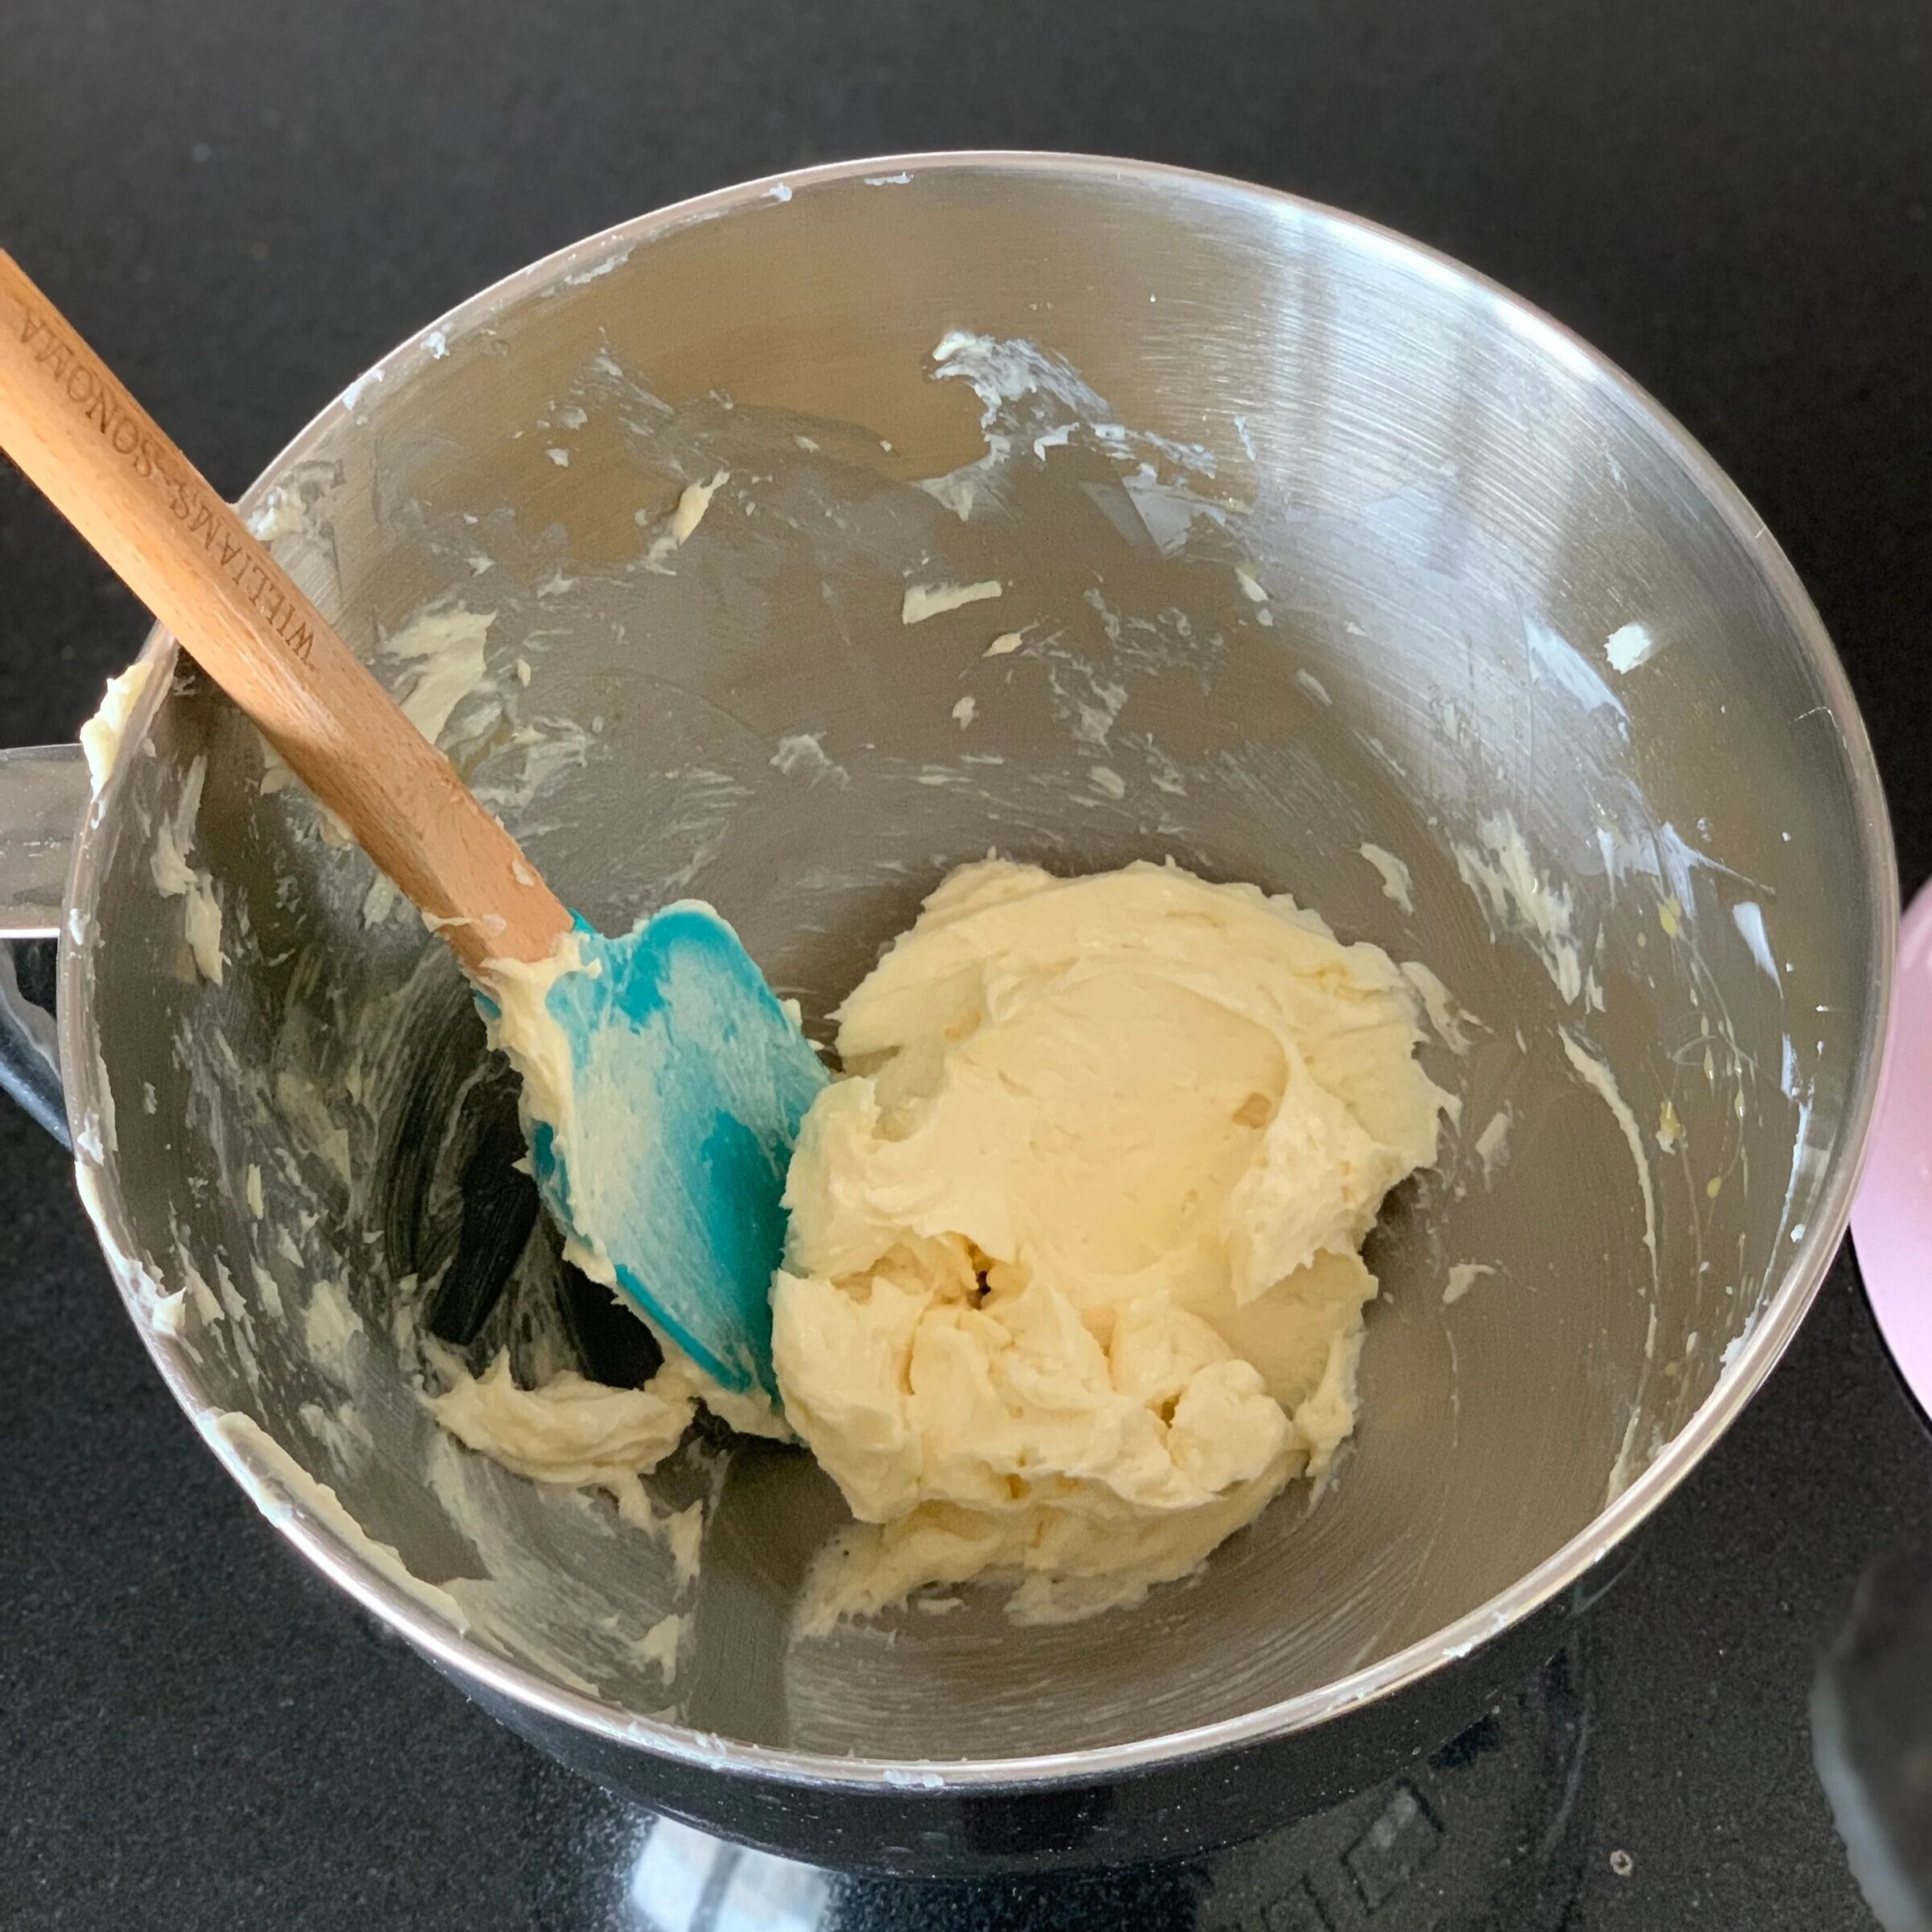
The crust of these tartlets is chocolate short dough which is made of simple ingredients of flour, cocoa powder, butter, sugar, vanilla extract and eggs. The first step is to cream the butter and sugar until it is smooth and light in color. Next, I gradually added the vanilla extract and eggs, blending completely after each addition. Finally, I added the sifted flour and cocoa powder all at once and mixed until it just came together.


I then turned the dough out onto a floured surface to bring it together and wrapped it tightly in plastic wrap. I chose to wrap it in a rectangular shape so it would roll more easily in that shape later in the process. I refrigerated the dough for at least one hour before using.


After refrigerating the dough for an hour, I rolled it out to a 1/8 inch thick rectangle and cut out pieces of dough to lay into the tartlet shells. I initially placed each small piece into individual shells, allowing the slack at the sides to fall over on top of the center of the dough.


Working one by one on each tart, I folded the slack dough back up the sides of the tartlet pan and gently pushed the dough into each crease. When finished, I rolled the rolling pin over the top of each tart to pinch off excess dough. Admittedly, this worked well in the past with a very large tart pan, but with these small 4 inch tartlets, working a knife sequentially around the edge worked much better.


These small tartlets require full blind baking prior to filling. For a refresher on the blind baking process, see by last blog where I made a Zesty Lime Tart.


Step 2: Make the soft caramel filling
Caramel is notoriously difficult to make. In fact, this recipe calls for making the caramel without adding any water, which made me quite nervous as it comes with a higher risk of burning the caramel. That said, adding water comes with its own risk of crystallizing the sugar and having to start over. In this time of coronavirus “shelter at home,” I have limited supplies so I decided to risk burning the caramel over having to start over completely. First I added the sugar and lemon juice to a saucepan, heating until the sugar was dissolved. I tried not to disturb the sugar except to slightly combine by pulling sugar at the edges of the pan towards the center.


Meanwhile I heated the heavy cream to prepare for combination with the melted sugar. Once the sugar was a dark amber / copper color, I removed it from the heat and slowly added the hot cream, continually whisking as I added it. Lastly I added butter and continued to stir until it was melted and fully incorporated.


Step 3: Make the soft ganache filling
The day before these other steps, I measured out dark chocolate in a heat-safe bowl. After heating up heavy cream on the stove, I poured it over the dark chocolate pieces. After letting it stand for one minute, I gently combined the chocolate and heavy cream until smooth and strained it into a separate bowl.
The next day, I took the cooled ganache and added heavy cream on top. I whipped this mixture with a whisk attachment until it resembled a chocolate mousse.


Step 4: Assemble the tartlets
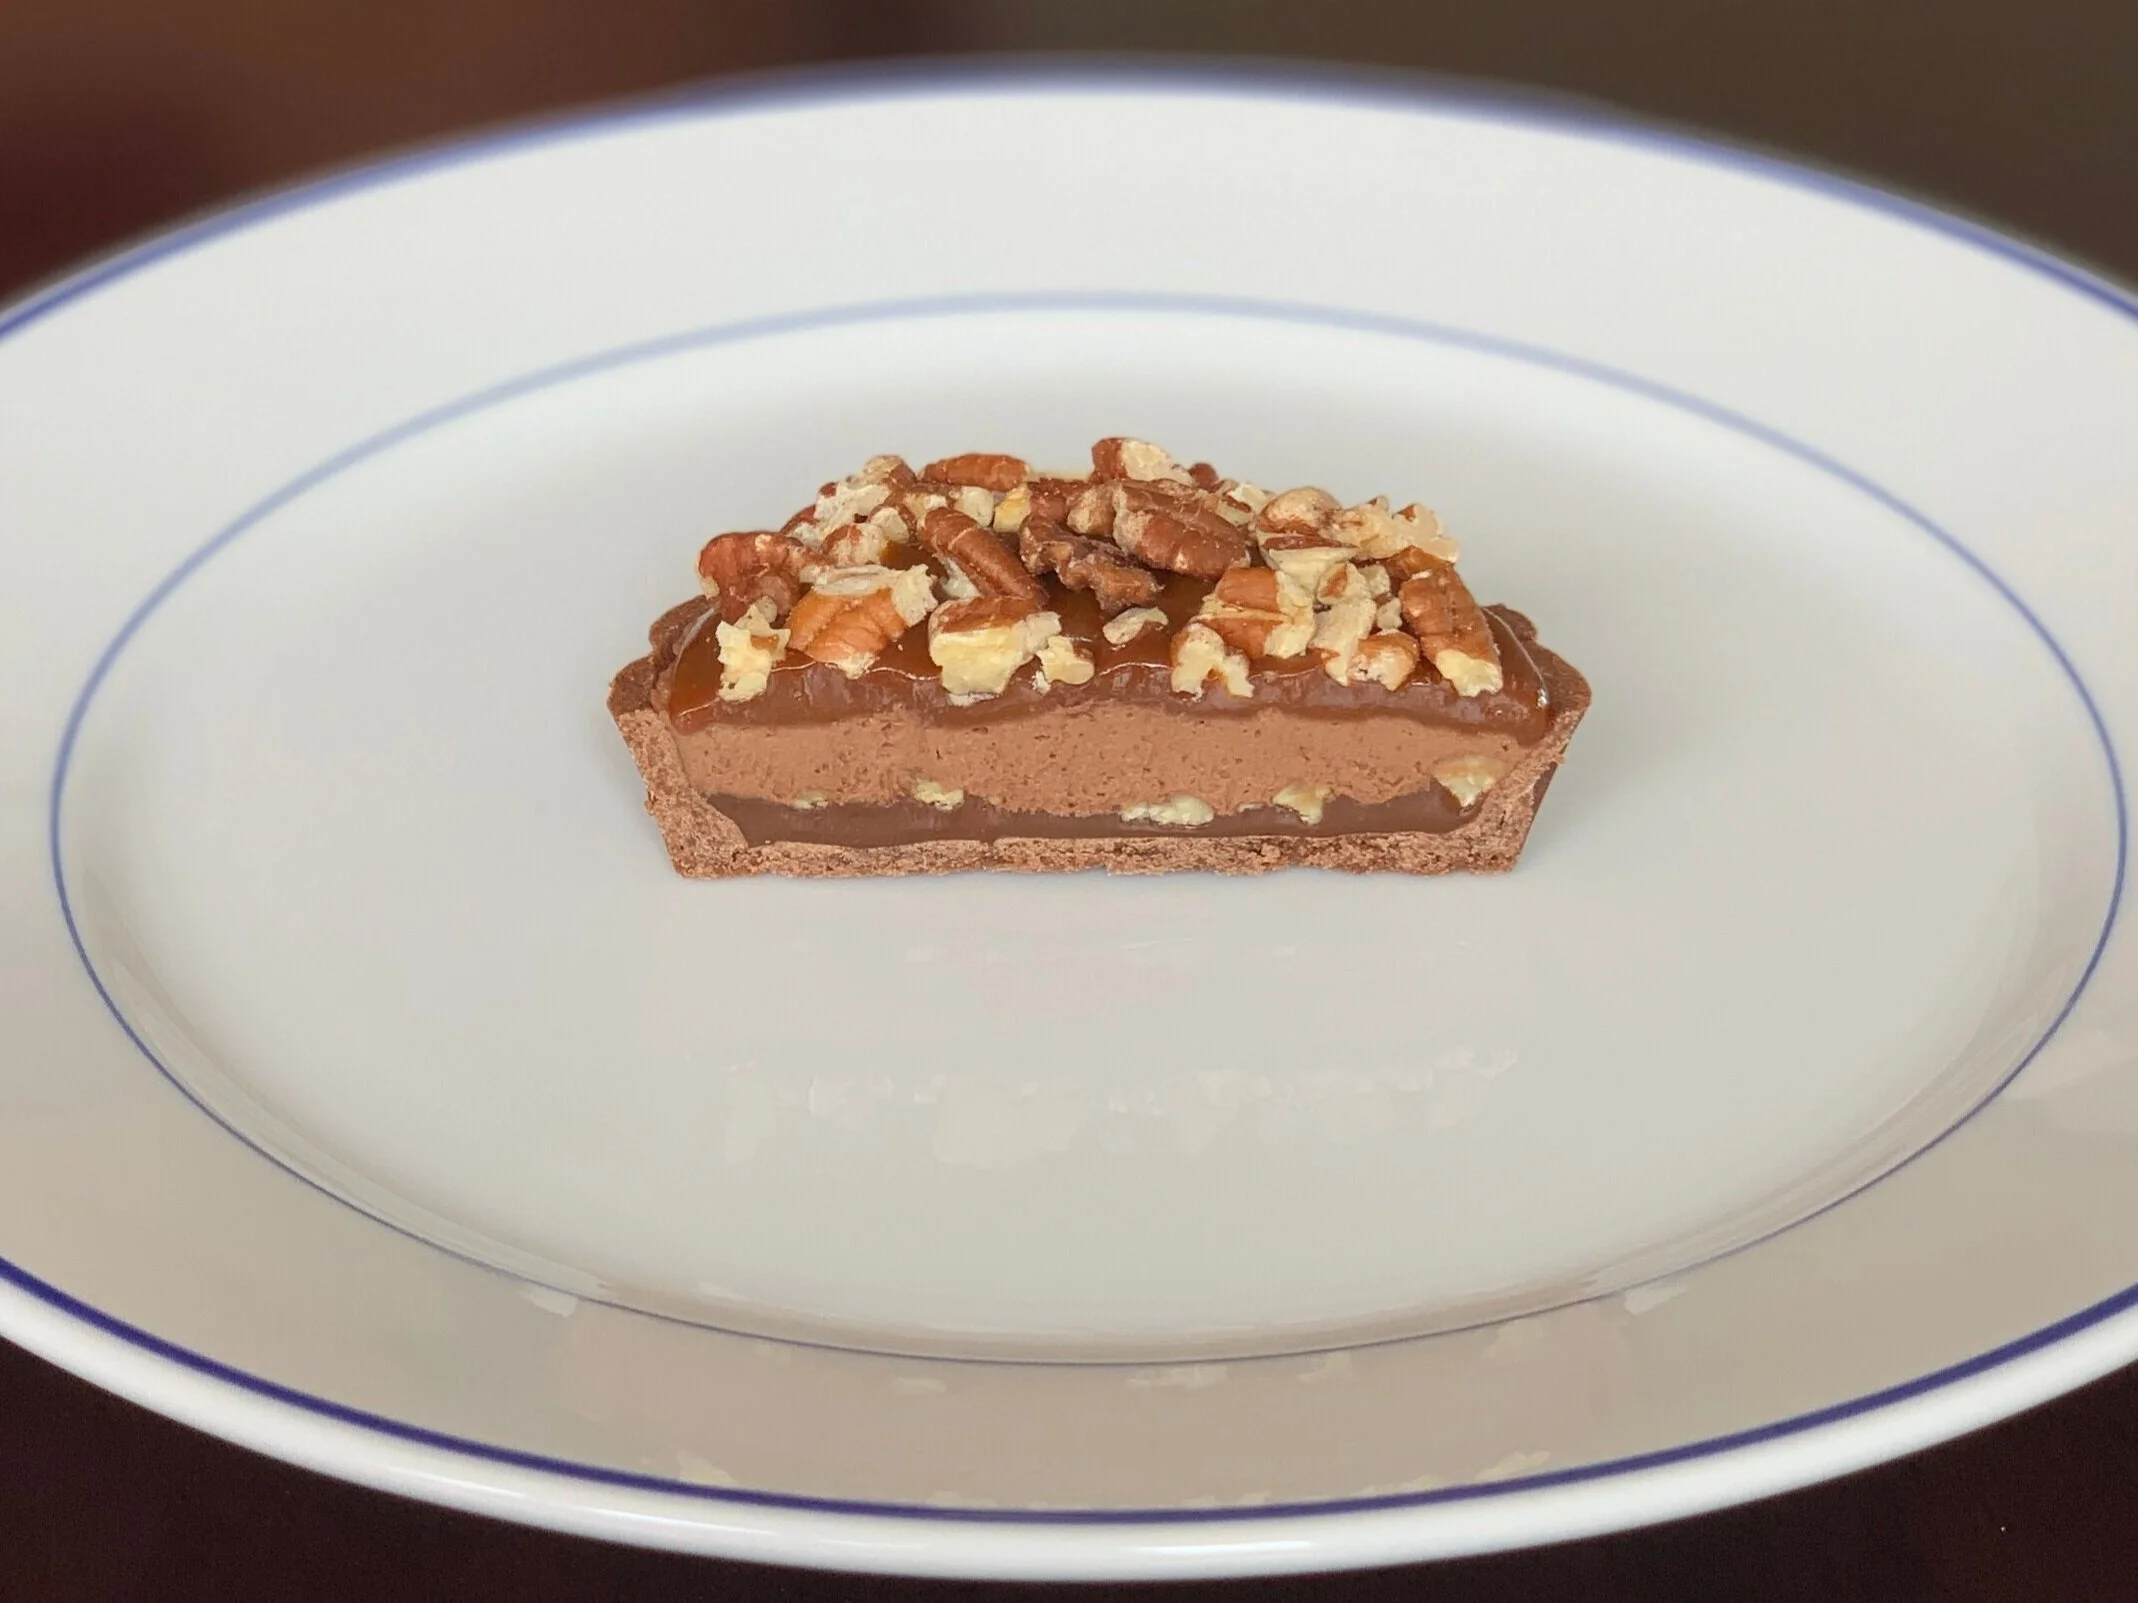
The tartlets are layered as follows: caramel, pecans, ganache, caramel, pecans. I first spooned in a layer of caramel, tilting the tartlet from side to side to ensure even coating. I used a scale to make sure I was adding the same amount of caramel to each tart and would have enough left for the other tarts and layers. I next added toasted, chopped pecans to this layer. After allowing the caramel and pecans to sit for a few minutes, I spread a layer of ganache on each tartlet and placed them in the freezer to set. As the tartlets were freezing, my remaining caramel started to stiffen. Before moving on to the next step, I lightly heated the caramel to return it to a spreadable consistency. I then added second thin layer of caramel on top of the ganache, followed again by chopped pecans.


And there you have it, Pecan Passion Tartlets!

Lessons learned:
As I rolled out my chocolate short dough, it kept cracking. I think I incorporated too much flour as I was rolling it out.
I ended up only having enough dough to cut out five circles for the shells, when I had intended to make six. However, I had a piece of rolled dough large enough to cover the base of the sixth tartlet pan and then I used scraps to piece together the sides. This actually worked remarkably well and I would say that was my best looking tartlet shell!
I did slightly burn the caramel by having it on the heat for too long. Next time, I will use a candy thermometer to check the temperature rather than relying on how the caramel looks to know if it is done.
Until next time…